
As an Amazon Associate I earn from qualifying purchases.
The Basics of Outdoor Grilling
Types of grills: gas, charcoal, and electric
Before you dive into the world of outdoor grilling, it’s important to understand the three main types of grills: gas, charcoal, and electric. Knowing the differences will help you choose the right grill for your cooking style and preferences.
- Gas grills: These are the most popular type of outdoor grill, known for their quick heat-up time and easy temperature control. They’re powered by propane or natural gas and are perfect for those who want a fuss-free cooking experience.
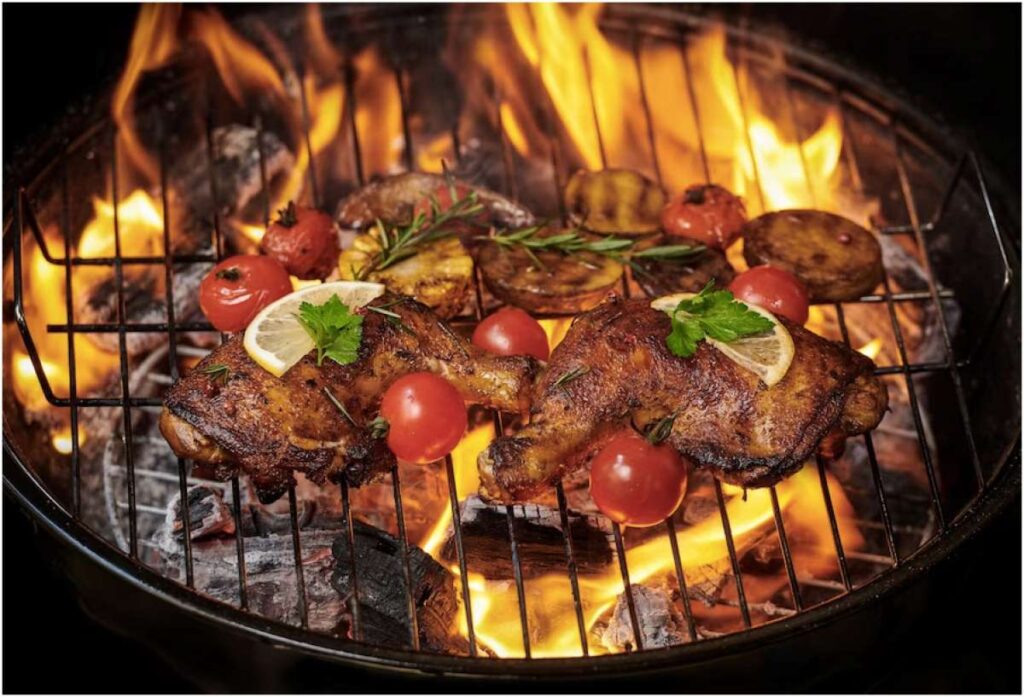
- Charcoal grills: For purists who love the smoky flavor that charcoal imparts to food, a charcoal grill is the way to go. It requires a bit more time and effort to set up and clean, but the payoff in taste is often worth it.
- Electric grills: If you live in an apartment or have limited outdoor space, an electric grill might be your best bet. They’re easy to use, just plug them in and you’re good to go. However, keep in mind that electric grills often can’t achieve the high heat levels of gas or charcoal grills and won’t provide the same smoky flavor.
Understanding grill heat zones
Once you’ve chosen your ideal grill, it’s time to learn about heat zones. A well-prepared grill will have different heat zones, allowing you to cook different foods at the same time, with varying levels of heat. Here’s a quick primer:
- Direct heat: This is right above the heat source, and is perfect for searing and quick-cooking items like burgers, hot dogs, and shrimp.
- Indirect heat: This is the area around the direct heat zone, where the temperature is lower. This is ideal for slow-cooking larger cuts of meat or delicate items like fish and vegetables.
- Two-zone grilling: To set up a two-zone grill, simply heat one side of the grill for direct cooking, and leave the other half for indirect heat. It’s a fantastic way to have the versatility of both heat zones for a well-rounded grilling experience.
Essential grilling tools and accessories
Equip yourself with these must-have grilling tools and accessories to make your outdoor cooking adventures a breeze:
- Grill tongs and spatula: A good pair of grill tongs and a sturdy spatula are indispensable for flipping and turning food easily.
- Grill brush: Keep your grates clean and ready for grilling with a high-quality grill brush.
- Chimney starter: If you’re using a charcoal grill, a chimney starter is a must-have for quickly and easily lighting your charcoal without lighter fluid.
- Meat thermometer: A digital meat thermometer ensures your food is cooked to the perfect temperature, eliminating the guesswork that often leads to over- or undercooked meat.
- Grill gloves: Protect your hands with heat-resistant grill gloves, especially when dealing with hot grates, coals, or flare-ups.
Proper cleaning and maintenance of your grill
To keep your outdoor grill in primo condition for years to come, follow these simple cleaning and maintenance tips:
- Regular cleaning: Brush your grill grates clean after each use to prevent stuck-on food and rust. Once or twice a season, give your grill a deep clean by removing and cleaning your grates, grease tray, and burners (for gas grills).
- Oil your grates: Before preheating your grill, use a paper towel to apply some cooking oil to your grates. This will help prevent food from sticking and make your grill easier to clean afterward.
- Inspect and replace parts: Periodically check your grill for any worn-out or damaged parts like grates, burners, and hoses. Replace these as needed to keep your grill running smoothly and safely.
By mastering the basics of outdoor grilling – from choosing the right grill and understanding heat zones, to equipping yourself with essential tools and properly maintaining your equipment – you’re well on your way to becoming a backyard barbecue hero. Practice your skills, try out new recipes, and don’t be afraid to experiment. Happy grilling!
Gas Grill Tips and Tricks
If you’re looking to up your barbecue game, gassing up your grilling skills with a gas grill might just be the ticket to succulent, smoky perfection. In this section, we’ll delve into the benefits of using a gas grill, how to light and control heat, setting up the grill to suit various cooking methods, and some essential safety precautions to keep in mind.
Benefits of using a gas grill
Gas grills have become increasingly popular among BBQ enthusiasts, and it’s no wonder why. They offer several advantages over traditional charcoal grills:
- Convenience: You can easily ignite your gas grill with a push of a button or turn of a knob, and there’s no need to fuss around with charcoal and lighter fluid.
- Temperature control: You can quickly and precisely adjust the heat on a gas grill, making it perfect for a range of cooking styles – from low and slow cooking to high-heat searing.
- Cleaner cooking: Gas grills tend to be less smoky and produce fewer ashes than charcoal grills, which means less mess to clean up after your cookout.
- Environmentally friendly: Unlike charcoal grilling, gas grilling produces fewer greenhouse gas emissions, making it a more eco-friendly option.
Lighting and controlling heat on a gas grill
Before getting started, make sure your propane tank is securely connected to your gas grill. To light your gas grill:
- Open the lid.
- Turn the gas on at the tank.
- Turn one of the burner knobs to high.
- Press the igniter button to ignite the burner. If your grill doesn’t have an igniter button, you can use a long match or lighter.
- Once the first burner is lit, gradually turn on the remaining burners to the desired heat setting.
Controlling the heat on a gas grill is a cinch. Just turn the knobs to regulate the temperature. For perfect results, use a grill thermometer to monitor the temperature inside the grill – this will help you ensure that your food is cooked evenly and to perfection.
Optimal gas grill setup for various cooking methods
Depending on the type of dish you’re preparing, you’ll need to set up your gas grill differently. Here are some suggestions:
- Direct grilling: For thin-cut meats and quick-cooking foods (like sausages, burgers, and vegetables), preheat all burners on high, and then lower the heat as needed for cooking. Cook your food directly above the lit burners.
- Indirect grilling: For larger cuts of meat that require longer cook times (like whole chickens, roasts, and ribs), preheat all burners, then turn off one or more burners to create a cooler area on the grill. Place your food over the unlit burners and close the lid to trap heat – this will ensure even cooking without burning the outside of your food.
- Zone grilling: For dishes that require both high and low heat, set up your grill with distinct heat zones – one side with high heat and the other side with low heat. Start cooking your food over the high-heat zone and finish it on the low-heat side for a perfect sear and juicy interior.
Gas grill safety precautions
Safety is paramount when working with gas grills. Follow these essential safety tips:
- Double-check connections: Before lighting your grill, make sure all connections between the propane tank and the grill are secure.
- Don’t leave the grill unattended: As with any cooking method, never leave a lit grill unattended. Be prepared to quickly react if flare-ups occur.
- Keep a fire extinguisher nearby: Accidents can happen, so it’s wise to have a fire extinguisher readily available.
- Check for leaks: Routinely inspect your propane tank and grill for leaks or damaged hoses. You can use a soapy water solution to check for leaks; if bubbles form when you apply the solution around connections and hoses, there’s likely a leak. Turn off the gas and repair or replace the damaged parts before using the grill.
- Store propane tanks properly: Keep propane tanks outdoors, away from heat sources, and never store them in enclosed spaces like garages.
Now that you’re armed with the knowledge to conquer gas grilling, it’s time to put these tips and tricks to the test and elevate your outdoor cooking game!
Charcoal Grill Tips and Tricks
Whether you’re a seasoned grill master or a novice at the art of outdoor cooking, there’s always room for improvement. In this section, we’ll provide you with helpful tips and tricks to get the most out of your charcoal grill.
Benefits of using a charcoal grill
Charcoal grills offer several advantages over gas and electric grills. Not only do they give your food that delicious, smoky flavor, but they also provide an exceptional level of heat control. Additionally, they are cost-effective and highly versatile, allowing you to cook a wide variety of dishes.
Choosing the right charcoal
To start, it’s essential to choose the right type of charcoal for your grill. There are two main types of charcoal: briquettes and lump charcoal. Briquettes are uniform in size and shape, providing a consistent heat source for even cooking. Lump charcoal, on the other hand, is irregular in shape, allowing for a more intense and smoky flavor. Both options have their merits, so experiment to find the one that best suits your grilling needs.
When selecting your charcoal, also ensure that it’s made from natural hardwood, as this will result in a cleaner burn and better flavor. Avoid using instant charcoal or briquettes with lighter fluid, as they can introduce unpleasant flavors and chemicals to your food.
Starting and maintaining a charcoal fire
Starting a charcoal fire can be tricky, but with a few tips and tricks, you’ll be able to get your grill going in no time. First, avoid using lighter fluid, as it can affect the taste of your food. Instead, use a chimney starter, which provides a hassle-free method of lighting your charcoal.
To use a chimney starter, first stuff the bottom with newspaper, then add your charcoal to the top. Light the newspaper, and the flames will work their way up, igniting the charcoal. Once the charcoal is glowing, use heat-resistant gloves or tongs to carefully transfer the hot coals to your grill.
To maintain a consistent fire, add more charcoal as needed, and regularly shake the grates to remove any ash buildup. Remember that charcoal grills require proper ventilation, so ensure the grill’s vents are open to maintain airflow and temperature control.
Optimal charcoal grill setup for various cooking methods
Charcoal grills offer flexibility and versatility, allowing you to cook using multiple methods. To determine the best setup for your grill, consider the type of food you’re cooking and your desired cooking method.
- For direct cooking, spread the hot coals evenly across the base of the grill. This method works best for quickly cooking thin cuts of meat, such as steaks and burgers.
- For indirect cooking, arrange the hot coals to one side of the grill, creating hot and cool zones. This enables you to cook larger cuts of meat, like whole chickens and roasts, without the risk of charring the outside.
- For a combination of direct and indirect cooking, split the grill into three sections: a hot zone, a medium zone, and a cool zone. This provides versatility, allowing you to sear food over the hot zone and then move it to the cooler sections to finish cooking.
Charcoal grill safety precautions
Finally, it’s crucial to follow safety precautions when grilling with charcoal:
- Set your grill up on a level, non-combustible surface, away from any flammable objects or overhangs.
- Keep children and pets at a safe distance from the grill while in use.
- Use heat-resistant gloves and long-handled utensils to protect yourself.
- Do not move your grill once it’s lit or full of hot coals.
- Properly extinguish your coals by closing all vents and allowing the grill to cool completely. Dispose of the cooled ashes appropriately.
By following these tips and tricks, you’ll be well on your way to mastering the art of charcoal grilling. So, fire up that grill, and let the delicious outdoor cooking adventures begin!
Electric Grill Tips and Tricks
It’s time to upgrade your outdoor cooking game! You don’t have to be a professional chef to master the art of grilling. With an electric grill, you can create mouth-watering meals with minimal effort and expertise. This section dives into electric grilling tips and tricks, covering its benefits, control settings, optimal setup for different cooking methods, and safety precautions.
Benefits of Using an Electric Grill
Say goodbye to the hassles of dealing with propane tanks and charcoal with an electric grill. Below are some benefits you’ll enjoy:
- Convenience: All you need is a power outlet, and you’re good to go! No more lugging around a heavy propane tank or dealing with messy charcoal.
- Consistent heat: Electric grills provide steady, even heat throughout the grilling process, ensuring your dishes are cooked evenly and to perfection.
- Easy to clean: Due to the absence of open flames and flare-ups, electric grills are much easier to clean. Just wait for your grill to cool down, and you can easily wipe off the grime with a soft cloth.
- Eco-friendly: Electric grills emit fewer pollutants compared to gas and charcoal grills, making them an environmentally friendly choice for outdoor cooking.
- Compact design: Most electric grills have a space-saving design, making them perfect for those who have limited outdoor space or live in apartments.
Understanding Electric Grill Control Settings
Next up is mastering the grill controls to set the right temperature for your recipes. Here’s a quick guide to understanding electric grill control settings:
- Low (250°F – 300°F): Ideal for slow cooking and smoking meats like ribs, brisket, and tenderloin.
- Medium (350°F – 400°F): Perfect for grilling vegetables, fish, and delicate meats like chicken breasts or shrimp.
- High (450°F – 500°F): Great for searing steaks and burgers to achieve that irresistible crust.
Keep in mind that the weather and grill conditions can affect the heat distribution, so you might need to adjust the grill settings accordingly.
Optimal Electric Grill Setup for Various Cooking Methods
Different dishes require different grilling methods. Here are a few tips on setting up your electric grill based on your cooking preference:
- Direct Grilling: Place food items directly on the heated grill grates for fast, high-heat cooking, perfect for burgers, steaks, and kabobs. Make sure the grill is preheated for at least 10-15 minutes at your desired temperature.
- Indirect Grilling: If you’re cooking larger cuts of meat or dishes that require longer cooking times, consider using the indirect grilling method. You can achieve this by preheating one section of your grill and placing the food on the unheated side. This approach allows your food to cook evenly and reduces the risk of burning.
- Combo Cooking: This involves using both direct and indirect grilling methods. Start by searing the food on high heat directly above the heated grates, and then move it to the cooler side of the grill to finish cooking.
- Plank Grilling: Enhance the flavors of your fish and seafood by using wood planks. Soak the plank in water for about an hour, place your seasoned fish on top, and then place the plank on the grill. Make sure to keep a spray bottle handy to put out any flare-ups!
Electric Grill Safety Precautions
Finally, follow these safety steps to ensure a fun and accident-free grilling experience:
- Inspect the power cord: Always check the electric cord for damage or wear and tear before plugging it in.
- Avoid using extension cords: Try not to use extension cords, as they might not handle the required wattage, creating a fire hazard.
- Keep the grill clean: Make sure your grill is clean and free from grease build-up to prevent flare-ups or fires.
- Supervise the grill: Don’t leave your grilling unattended, and always keep children and pets at a safe distance.
- Let it cool down: Give your electric grill ample time to cool down before attempting to clean or move it.
Now that you’re armed with these tips and tricks, it’s time to show off your grilling skills! Happy grilling, and bon appétit!
Direct vs. Indirect Grilling
One of the most important decisions you’ll make when it comes to grilling is whether to use direct or indirect heat. Don’t sweat it – we’ve got you covered with an overview of both methods and some guidance on when to use each one. Let’s dive in!
Understanding Direct Grilling
Direct grilling is just what it sounds like – your food sits directly on the grill grates and cooks from the intense heat below. This method is perfect for thin cuts of meat, small or thin veggies, and protein that needs high heat to seal in the juices and create a beautiful char.
When you’re using direct heat, you’ll want to pay close attention because the high heat can quickly turn your food from deliciously grilled to overcooked or worse, charred to a crisp (yikes!).
When to Use Direct Heat
Direct heat is your go-to method for quick-cooking items like:
- Burgers
- Thin-cut steaks (like skirt or flank)
- Seafood
- Kebabs
- Sliced veggies (think zucchini or bell peppers)
These foods typically cook pretty fast, so keep an eye on them and make sure you’ve got your tongs at the ready!
Understanding Indirect Grilling
Indirect grilling is a gentler method where the heat source is off to the side, rather than directly beneath the food. Picture a two-zone setup: one with high heat and the other with little to no heat. This allows for slower, more even cooking and is excellent for larger, thicker cuts of meat that need time to cook through without burning the exterior.
When to Use Indirect Heat
Indirect heat is perfect for longer-cooking items and large cuts of meat, such as:
- Whole chickens or turkeys
- Ribs
- Pork shoulder
- Beef brisket
- Vegetables like whole artichokes or thick slabs of cauliflower
This low-and-slow approach can really elevate your grill game, but it does require a bit more patience and planning ahead. Trust us, though – the results are worth the wait!
Combination Grilling: Using Direct and Indirect Heat Together
Ready to level up? Combination grilling utilizes both direct and indirect heat, allowing you to sear your food first to lock in the flavor then move it to the indirect heat zone to finish cooking. This method can help you achieve tender, juicy meats with a nice charred crust (is your mouth watering yet?).
Here’s a quick breakdown of how to use combination grilling:
- Preheat your grill with a two-zone setup: high heat on one side and little to no heat on the other.
- Sear your food quickly on the high heat zone, aiming for a nice caramelization or char on the outside.
- Move your food to the indirect heat zone to finish cooking at a more leisurely pace.
In conclusion, becoming a grill master is all about understanding and properly utilizing direct and indirect heat. So go ahead, fire up that grill, and impress your friends and family with your newfound grilling prowess. Happy grilling!
Grilling Different Types of Food
Upgrading your grilling game doesn’t have to be tough – it’s all about understanding the nuances between various types of food. Once you’ve mastered these subtleties, you’ll be well on your way to becoming the ultimate grillmaster. Let’s dive into some best practices for grilling different types of food, covering everything from mouth-watering steaks to zesty grilled veggies.
Best Practices for Grilling Meat
When it comes to grilling meat, it’s all about achieving that perfect sear and juicy interior. To do this, you’ll need a hot, well-oiled surface; so preheat your grill, then brush the grates with vegetable oil. Next, pat your meat dry and season generously with salt and pepper or your favorite rub. If you’re grilling steaks, let them sit at room temperature for 30 minutes before grilling. This helps ensure an even cook.
When grilling, always remember the golden rule of “don’t fiddle.” That means resisting the urge to constantly flip your meat. Instead, let it cook undisturbed, only turning it once. This allows those mouthwatering grill marks to form and the meat to cook evenly. Be sure to use a meat thermometer to ensure your desired doneness.
How to Grill Poultry
If you thought grilling meats was complex, well, buckle up because poultry can be a bit trickier. The key to deliciously grilled poultry is a combination of direct and indirect heat. If cooking whole birds, butterfly them, or flatten bone-in cuts like legs and thighs, so that they cook more evenly.
It’s crucial to marinate your poultry, as this not only helps tenderize the meat but also imbues it with sensational flavor. You can marinate for as little as 30 minutes or as long as 24 hours, in the fridge.
Finally, aim for those lower, slow-burning temps to prevent drying out your poultry. Keep your grill lid closed to trap in that heat. Cook to an internal temperature of 165°F for chicken and 160°F for turkey, checking with a meat thermometer – don’t mess with salmonella!
Perfecting Grilled Fish and Seafood
Grilling fish and seafood can be daunting, but with the right approach, you’ll see it’s a piece of cake (or rather, a piece of fish!). Opt for firm-fleshed fish like salmon, tuna, or halibut, as these are less likely to fall apart on the grill. To avoid sticking, clean your grill grates meticulously, and oil both the grates and the fish before cooking.
If you’re dealing with delicate fish like flounder or tilapia, consider using a fish basket, or even grill the fish on a cedar plank, imparting an incredible smoky flavor. Keep an eye on your cook, as fish tends to cook faster than other meats—usually 8-10 minutes for a 1-inch-thick fillet. You’ll know the fish is done when it flakes easily with a fork.
Grilling Vegetables and Fruit
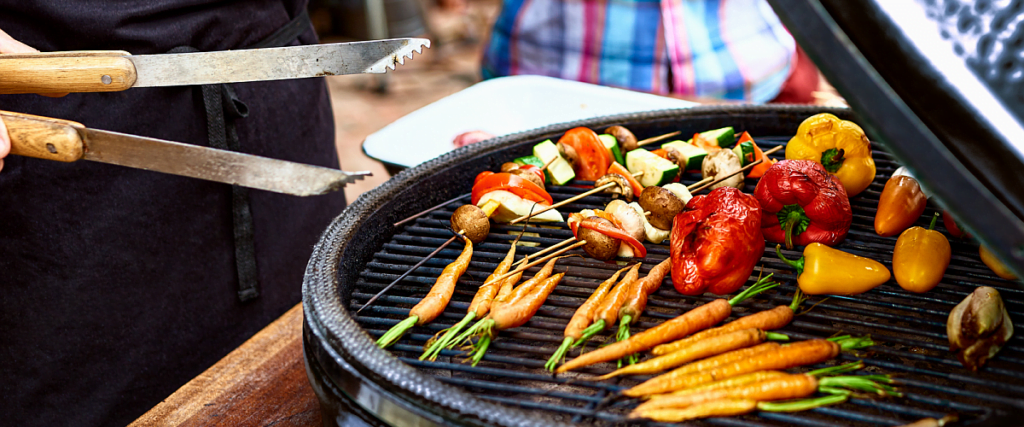
Who says grilling is only for carnivores? Fire up those veggies and fruits for an entirely new and exciting eating experience. For vegetables, choose ones that are firm and won’t fall through the grill grates, like bell peppers, asparagus, portobello mushrooms, and zucchini. Cut your veggies into even pieces, brush them with olive oil, and season with salt and pepper. Turn occasionally until tender and slightly charred.
Don’t forget about the fruits! Grilling brings out the natural sugars in fruit and results in a caramelized, beautifully tender treat. Firm fruits like pineapple, peaches, and watermelon make excellent choices. Cut the fruits into thick wedges or slices, brush with a bit of melted butter or honey, and grill until slightly charred and caramelized. They’re perfect for summer desserts or even as an addition to salads.
Grilling Non-Traditional Items Such as Pizza and Desserts
Now that you’re a grillmaster in training, it’s time to get creative. Grilled pizza, anyone? Yes, you heard that right! Get that perfect crispy crust and smoky flavor by tossing your prepared pizza dough directly onto the grill. Cook for a few minutes, flip, and then add your toppings. Close the lid for even heat distribution and melty cheese.
You can also grill up some sweet treats, like s’mores, baked apples, or even grilled pound cake with fruit compote. With a little out-of-the-box thinking and some grilling expertise, the options are endless.
In summary, upgrading your outdoor cooking game is all about learning how to handle different types of food on the grill. Experiment with new techniques, flavors, and ingredients to truly elevate your grill skills. And most importantly, have fun and enjoy the fruits (or grilled meats) of your labor! Happy grilling!
Marinades, Rubs, and Sauces
Upgrading your outdoor cooking game involves mastering the art of using marinades, rubs, and sauces. These flavorful additions can make all the difference when grilling your favorite meats and veggies. In this section, we’ll discuss the differences between these flavor boosters, and give you some tips on how to use them effectively.
The difference between marinades, rubs, and sauces
Before we dive into the nitty-gritty, let’s quickly review the differences between marinades, rubs, and sauces.
- Marinades are liquid mixtures that you soak your food in before grilling. They typically consist of an acidic ingredient (like vinegar or citrus juice) to help tenderize the meat, along with herbs, spices, and oils to add flavor.
- Rubs are dry mixtures of herbs, spices, and sometimes sugar that you massage onto the surface of your food before grilling. They create a flavorful crust that seals in the juices as the food cooks.
- Sauces can be applied during or after cooking, often as a finishing touch. They’re usually thicker than marinades, and can add an impressive depth of flavor to your grilled creations.
Creating the perfect marinade
When it comes to crafting a delicious marinade, balance is key. You’ll want to mix up a concoction that has the perfect balance of acidity, oil, and seasonings. Here are some tips to help you create a marinade that’ll make your taste buds sing:
- Choose the right acid. Acids like vinegar, lemon juice, and wine are crucial in breaking down the proteins in your meat, making it more tender and flavorful. However, be careful not to marinate your meats for too long, as the acid can break down the proteins too much, resulting in a mushy texture.
- Be mindful of the oil. Oil not only adds flavor to your marinade but also helps the herbs and spices stick to your food. Opt for oils with high smoke points, like vegetable or canola oil, when grilling at high temperatures. Olive oil is great for lower-temperature grilling.
- Experiment with herbs, spices, and other ingredients. Feel free to get creative with the flavor profile of your marinade. Some popular additions include garlic, onion, rosemary, mustard, and soy sauce. Just remember to keep it balanced!
Applying rubs for maximum flavor
Rubs are all about creating a tasty crust on your food that enhances its natural flavors. Here are some pointers to help you get it right:
- Pat the meat dry. Before applying your rub, pat your food dry with a paper towel. This will ensure that the rub sticks better and forms a nice crust.
- Apply the rub generously. Don’t be stingy when it comes to applying your rub. In this case, more is usually better! You want to make sure the entire surface of your food is coated in the flavorful mixture.
- Let it sit. After applying your rub, let your food sit for at least 30 minutes, or up to a few hours, before grilling. This will give the flavors a chance to meld and penetrate the food.
Sauce application: timing and technique
There’s an art to applying sauce to your grilled creations that involves both proper timing and technique. Here are some things to keep in mind:
- Don’t sauce too early. Applying sauce too early in the grilling process can lead to burned food, as the sugar content in many sauces can caramelize quickly. Wait until the last 5 to 10 minutes of cooking to apply most sauces.
- Use a brush or mop. A brush or mop works well for applying sauces to your food, as it allows you to distribute the sauce evenly without causing a mess.
- Layer your sauces. For maximum flavor, try layering different sauces throughout the grilling process. For example, you might start with a base layer of barbecue sauce, followed by a tangy mop sauce, and finally a sweet glaze just before taking it off the grill.
By mastering the art of marinades, rubs, and sauces, you’ll seriously up your outdoor cooking game. Now, let’s get grilling!
Grilling Techniques and Recipes
Whipping up flavorful dishes in your backyard has never been more fun! In this section, we’ll take a deep dive into grilling techniques and recipes that will undoubtedly elevate your outdoor cooking game. So, let’s fire up the grill and get started!
Barbecue vs. grilling: the differences
While “barbecue” and “grilling” are often used interchangeably, they’re quite distinct from one another. Grilling refers to a fast and furious method, cooking foods at high heat for a short period. On the other hand, barbecuing involves cooking at lower temperatures for longer periods, typically using indirect heat. Now that we’ve cleared that up, let’s grill!
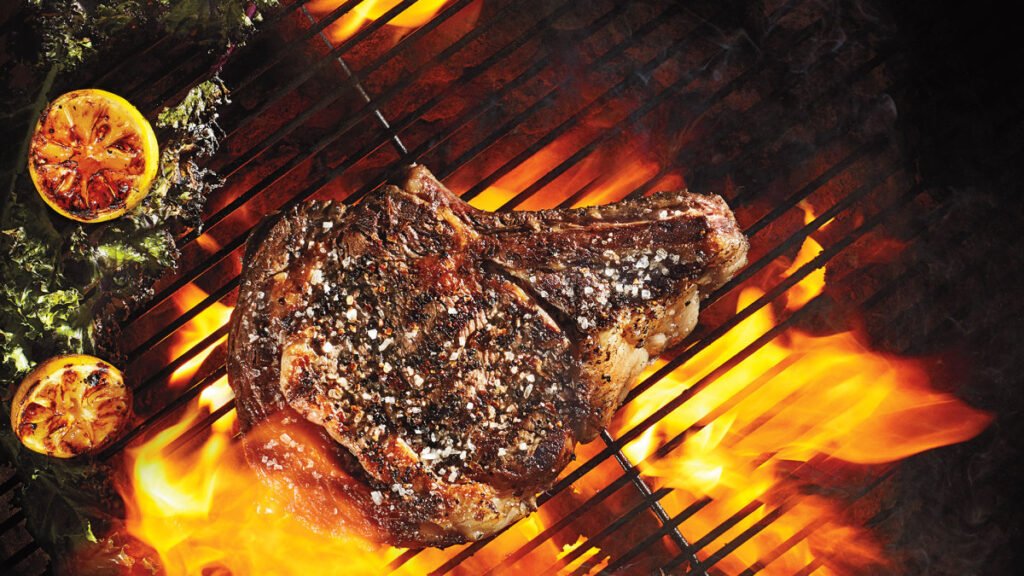
How to grill the perfect steak
There’s nothing quite like sinking your teeth into a juicy, perfectly grilled steak. Follow these steps, and you’ll be the talk of the neighborhood in no time!
- Choose your steak: Go for a high-quality cut like ribeye, sirloin, or filet mignon. Make sure it’s at least 1-inch thick to prevent overcooking.
- Season liberally: Don’t be shy with the salt and pepper! Give your steak a generous sprinkle on both sides before it hits the grill.
- Heat it up: Preheat your grill to medium-high heat. You want that sizzle when the meat makes contact!
- Get grilling: Grill your steak for about 4-5 minutes on each side for medium-rare. Adjust the time depending on your desired doneness.
- Let it rest: Remove your steak from the grill and let it rest, loosely covered with foil, for about 5 minutes. This allows the juices to redistribute, leading to a more tender steak.
Recipe: Smoky barbecue ribs
This succulent recipe will have you licking your fingers in delight! Here’s how to achieve the ultimate smoked ribs on your grill.
- Start with 2 racks of baby back ribs, and remove the membrane from the back of the ribs.
- Apply your favorite spice rub evenly on both sides of the ribs.
- Set up your grill for indirect heat, with the ribs not directly over the heat source. Maintain a temperature of 225°F (107°C) throughout the cook.
- Cook the ribs for about 4-5 hours, or until tender and the meat starts to pull away from the bone.
- In the last 30 minutes of cooking, brush the ribs generously with your favorite barbecue sauce.
- Remove from the grill and let them rest for a few minutes before slicing and serving.
Recipe: Grilled vegetable skewers
No outdoor feast is complete without a heaping serving of veggies. These colorful skewers pack a punch of flavor with a simple marinade.
- Cut your favorite vegetables into evenly-sized pieces. We recommend bell peppers, zucchini, red onion, and cherry tomatoes.
- Whisk together a marinade of olive oil, minced garlic, lemon juice, salt, and pepper. Marinate the veggies for at least 30 minutes.
- Skewer the marinated veggies onto metal or pre-soaked wooden skewers.
- Grill the skewers on medium-high heat for about 8-10 minutes, until veggies are tender and slightly charred, turning frequently.
- Serve your vibrant skewers hot off the grill!
Recipe: Fish tacos with grilled corn salsa
Take your taco game to the next level with these flavorsome fish tacos, accompanied by a zesty grilled corn salsa.
- Generously season fish fillets (we recommend mahi-mahi, cod, or halibut) with a mix of chili powder, cumin, salt, and pepper.
- Grill the fish on medium-high heat for about 3-4 minutes per side, until cooked through. Let it rest, then flake into bite-sized pieces.
- Grill corn on the cob directly on the grates, turning frequently until charred. Cut the kernels off the cob and combine with diced tomatoes, red onion, jalapeño, cilantro, lime juice, and salt.
- Assemble your tacos by placing a spoonful of fish on a warm corn tortilla, followed by a generous helping of grilled corn salsa. Add a squeeze of lime, and you’re ready to chow down!
Now that you have these mouthwatering techniques and recipes under your belt, there’s no excuse not to up your grilling game. So go ahead, fire up the grill, and dish out a backyard feast worthy of a standing ovation!
Troubleshooting Common Grilling Problems
Grilling can be loads of fun, but sometimes you might find yourself facing pesky issues that can get in the way of your perfect outdoor cooking experience. Don’t be discouraged, though, my friend! We’ve got solutions for some of the most common grilling problems you might encounter. Soon, you’ll be well on your way to becoming the ultimate grill master!
Avoiding flare-ups
Flare-ups can be quite a nuisance when you’re grilling. They usually happen when the fat from your food drips onto the coals or burners, causing an unpleasant smoky flavor and potentially burning your meal. But fear not! Here are a few tips to help you keep those flare-ups at bay:
- Trim excess fat from your meats before grilling.
- Use indirect heat for cooking fatty cuts of meat.
- Keep your grill clean by regularly scraping away any grease buildup from the grates and burners.
- Always keep a water spray bottle handy to extinguish flare-ups if they happen.
Preventing food from sticking to the grill
There’s nothing more frustrating than spending your precious time cooking a delicious meal, only to have it stick to the grill. Luckily, there are a few simple tricks to avoid this sticky situation:
- Preheat your grill to the appropriate temperature for your chosen food.
- Give your grill grates a thorough clean before cooking. A wire brush works wonders!
- Use a paper towel to apply a thin layer of cooking oil to the grates. This will create a non-stick surface for your food.
- Slightly undercook your food on the first side, then flip it and let it finish cooking on the other side. This will help prevent sticking.
Cooking food evenly
Isn’t it frustrating when you’re trying to cook a juicy steak or burger, only to end up with uneven results? Here are some tips to ensure even cooking so every bite is just right:
- Preheat your grill for at least 15 minutes before cooking.
- Use direct heat for searing, and then switch to indirect heat to finish cooking the inside.
- If you’re using coals, spread them out evenly to create a more consistent heat source.
- Place thicker items like steaks and chops on the hottest part of the grill, and thinner items like chicken and veggies on the cooler parts.
- Rotate your food occasionally to ensure even cooking.
Avoiding overcooked or undercooked food
No one wants to bite into a burger that’s charred on the outside and raw on the inside. To avoid this unfortunate fate, follow these tips:
- Invest in a good-quality, instant-read thermometer – it’s a game-changer!
- Use both hands – one to flip food items, and the other to test their doneness. Give your food a gentle press with your finger – the firmer it is, the more well-done it is.
- If you’re unsure whether your food is done, you can always cut into it to check. Better safe than sorry!
So there you have it, folks! By following these troubleshooting tips, you’ll be able to tackle common grilling problems head-on and upgrade your outdoor cooking game. Now go forth and show that grill who’s boss!
Expert Grilling Tips and Secrets
Who doesn’t love a good barbecue? With summer in full swing, it’s time to upgrade your outdoor cooking game. Whether you’re a seasoned griller or a novice, mastering these grilling techniques will impress your friends and family, and take your BBQ to the next level. So, let’s dive in, shall we?
Using wood chips and planks for added flavor
Ever wonder how the pros get that delicious smoky flavor in their grilled meats? The secret is using wood chips or planks to infuse extra taste into your BBQ masterpieces.
First, choose your wood. Hickory, oak, and mesquite are popular for their robust flavors, while fruitwoods like cherry and apple offer a sweeter touch. Soak the wood chips in water for at least 30 minutes before grilling – this will prevent them from burning too quickly. Then, drain the chips and sprinkle them on top of your charcoal, or, if using a gas grill, place them in a smoker box.
Alternatively, try grilling your meat on a wood plank. This technique is particularly fabulous for fish, as it prevents it from sticking to the grates while imparting a subtle, smoky flavor. Be sure to soak the plank for at least an hour, then place your seasoned protein on top and grill away!
The benefits of preseasoning your grill
Preseasoning your grill before you start cooking not only prevents food from sticking but also helps create those eye-catching, perfect grill marks. Here’s the deal: just as you season a cast iron skillet to create a non-stick surface, the same applies to your grill.
Simply preheat your grill, then brush it using a grill brush (or some crumpled aluminum foil) to get rid of any charred debris. Next, using tongs dipped in oil-soaked paper towels, evenly coat the grates – just be careful, as the oil may cause a flare-up. Lastly, allow the heat to “bake” the oil in for a few minutes, and voilà! Your perfectly-seasoned grill is ready for some action.
Mastering the two-zone cooking method
The two-zone cooking method, sometimes called indirect grilling, involves setting up two heat zones on your grill: one for high, direct heat, and another for lower, indirect heat. This technique is handy when you’re cooking different types of food that require varying heat levels.
For charcoal grills, simply create two heat zones by stacking the majority of the charcoal on one side, leaving the other side with minimal coals or no coals at all. If you’re using a gas grill, heat up one side and leave the other side unlit or on low heat.
Start by searing your meat on the hotter side, then move it to the cooler side to finish cooking. The result? Perfectly grilled food that’s cooked evenly, without burning the outside while the inside remains undercooked.
Creating perfect grill marks
We eat first with our eyes, and those coveted diamond-shaped grill marks let everyone know you’re a pro. To achieve these seductive sear lines, follow these easy steps:
- Preheat your grill to high heat and ensure the grates are clean.
- Oil your grates using the oil-soaked paper towel method, as mentioned earlier.
- Place your meat on the grill at a 45-degree angle and allow them to sear for a few minutes before turning them 90-degrees, but still on the same side.
- Flip your meat to the other side and repeat the process.
Boom! Your cookout guests will swoon over your grill mark artistry.
The role of resting meat after grilling
Last, but definitely not least, is allowing your grilled meat to rest after cooking. This step is crucial to a mouthwatering BBQ, as it allows the juices to redistribute within the meat, providing you with tender, flavorful bites throughout.
To let your meat rest, simply remove it from the grill and place it on a plate or platter. Tent it with aluminum foil to keep it warm and allow it to sit undisturbed for a few minutes – the exact time depends on the size of the cut. For example, a steak may need around five minutes, while a full brisket could require half an hour.
Armed with these expert grilling tips and secrets, you’ll be the envy of your next cookout. Now all you need is an apron that says, “Grill Master Extraordinaire.”
Frequently Asked Questions
What is the ideal grilling temperature?
Well, my friend, that all depends on what you’re cooking! For most meats like burgers, steaks, and chicken, a medium to high heat (around 400 to 450 degrees Fahrenheit) will get you those beautiful grill marks while ensuring your meal is cooked to perfection. Fish and veggies, on the other hand, are more delicate and generally require a medium heat (around 350 to 400 degrees Fahrenheit) to prevent them from drying out or burning.
How long should I preheat my grill?
Ah, patience is a virtue, especially when it comes to grilling! Preheating your grill is crucial to ensure an even cooking surface. On average, you should allow 10 to 15 minutes for gas grills and approximately 20 to 30 minutes for charcoal grills. Trust us, your taste buds will thank you!
What type of grill is best for beginners?
So, you’re new to the grilling game, huh? No worries, we’ve got your back! If you’re just starting out, your best bet is probably a gas grill. They’re easy to use, offer precise temperature control, and heat up quickly. Plus, they require less cleanup compared to their charcoal counterparts. Of course, some may argue that charcoal grills give you that authentic smoky flavor, but for convenience and simplicity – gas grills for the win!
Which type of oil should I use for grilling?
Great question! You’ll want to choose an oil with a high smoke point to prevent it from breaking down and causing flare-ups or burning your food. Some of our top picks for grilling include vegetable oil, canola oil, or grapeseed oil. Stay away from extra virgin olive oil, as its smoke point is too low for high-heat grilling. And remember, a little goes a long way – lightly brushing your food with oil before placing it on the grill will help prevent sticking.
Is it safe to grill on a windy day?
Yes, ma’am, it’s totally doable, but you’ll need to take some precautions! Firstly, position your grill so the wind is hitting the side and not blowing directly into the vents or chimney, as this can make temperature control tricky. For gas grills, keep the lid closed as much as possible – this helps maintain consistent temperatures, despite the wind’s best efforts. For charcoal grills, you may need to adjust your vent settings more frequently to account for the wind’s influence on airflow. Lastly, check your fuel levels – windy days might require a bit more fuel to keep your grill nice and hot.
So, there you have it, folks! Armed with these tips and tricks, you’ll be a grill-master in no time. Now slap on that apron, fire up the grill, and let’s get cookin’!
Amazon and the Amazon logo are trademarks of Amazon.com, Inc, or its affiliates.