

As an Amazon Associate I earn from qualifying purchases.
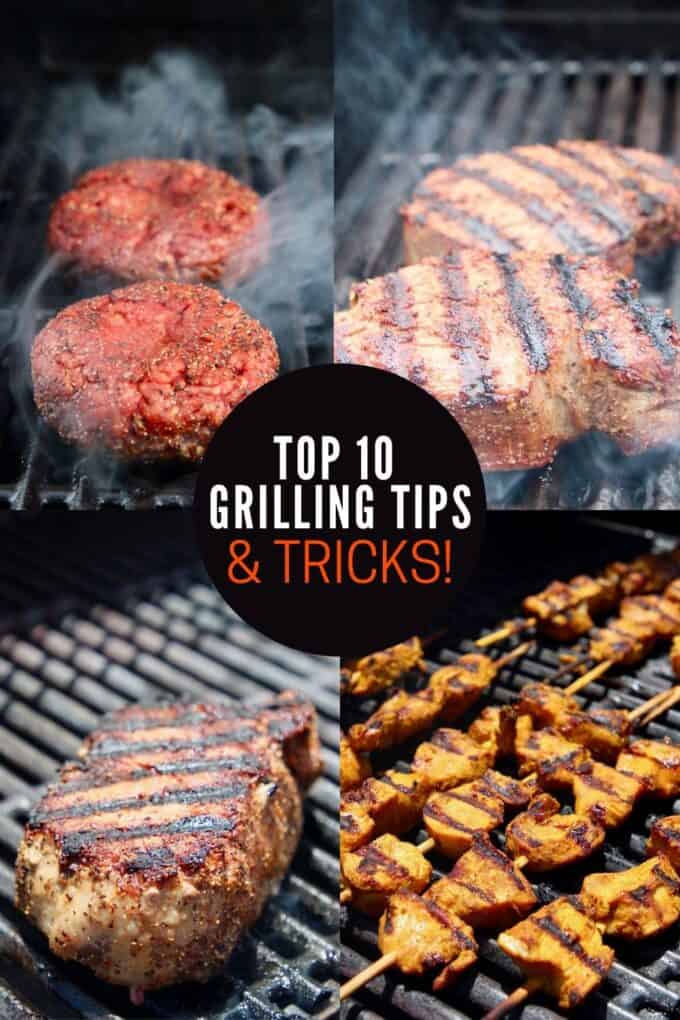
10 Essential Grilling Tips and Tricks for Perfect BBQ
Getting to Know Your Grill
First things first, you’ve gotta know your grill inside and out. That means reading the manufacturer’s instructions and understanding the different heat zones. Take the time to experiment with various heat settings to familiarize yourself with your grill’s capabilities. Remember, practice makes perfect!
Prepping Your Grill for Use
A clean grill is essential for achieving that perfect BBQ. Before each use, make sure to brush off any leftover debris from your grates. Then, to prevent sticking, heat up your grill and apply a light layer of cooking oil to the grates using a pair of tongs and a folded paper towel.
Choosing the Best Fuel
Charcoal or gas? It’s an age-old debate, but really, it’s all about personal preference. Charcoal grills provide that classic smoky flavor and sear marks, while gas grills offer a bit more control and consistency in temperature. Either way, ensure you’re using high-quality fuel for optimal performance.
Selecting the Right Cuts of Meat
When it comes to BBQ, selecting the right cuts of meat is crucial. Look for cuts with ample marbling (a.k.a. that delicious fat) for maximum juiciness and flavor. Some favorites include ribeye, New York strip, and porterhouse steaks, as well as baby back and spare ribs.
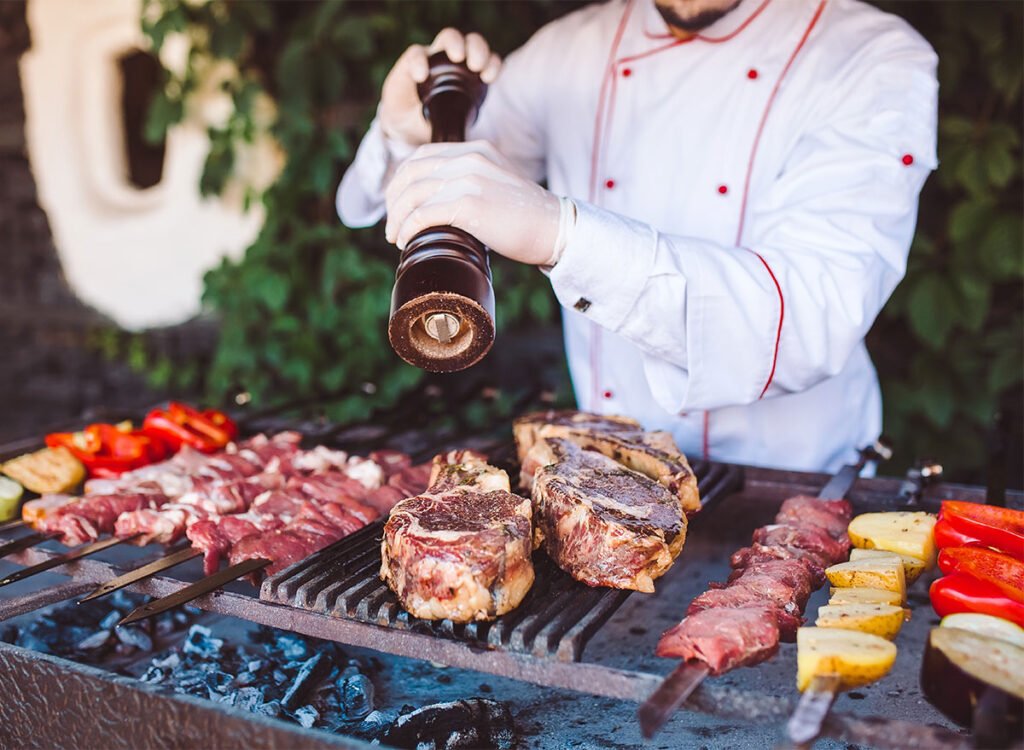
Marinating and Seasoning Techniques
Marinating and seasoning your meats can take your BBQ to the next level. For marinating, give your cuts ample time to soak up all those tasty flavors – we’re talking at least a couple hours, if not overnight. As for dry rubs, apply generously and evenly, and let the meat sit for a bit before hitting the grill.
Proper Grill Temperature Management
When it comes to grilling, temperature management is key. For searing and achieving those coveted grill marks, you’ll want a high heat (around 450-500°F). For more delicate items like fish and veggies, aim for medium heat (around 350°F). And for low and slow cooking (think ribs), stick to a lower heat (around 225-275°F).
Flipping and Turning Techniques for Even Cooking
Move over, grillmaster! Here’s the scoop on flipping and turning your food for even cooking. Rule of thumb: the fewer, the better. Over-flipping can lead to uneven cooking and less browning. Use a pair of tongs or a spatula to gently flip items only once or twice, ensuring each side has ample time on the grates.
Managing Flare-Ups and Smoke
Smoky flavor is good, but excessive smoke? Not so much. To control flare-ups, keep your grill clean, trim excess fat off your cuts of meat, and keep a spray bottle of water on hand. As for smoke, make sure to keep your grill’s vents open for adequate air circulation, and avoid using wet marinades or overly greasy items.
Determining Doneness and Safe Cooking Temperatures
Safety first, folks! Ensuring that your grilled meats reach safe cooking temperatures is crucial. Invest in a high-quality instant-read thermometer and reference the USDA’s guidelines for temperature safety. Remember, slightly undercooked is better than overcooked – you can always toss it back on the grill!
Resting and Slicing Your Cooked Meat
Ah, the grand finale! After all that grilling, give your meats a chance to rest, allowing those juices to redistribute for a perfect (and juicy) bite. For steaks, aim for a 5-10 minute rest. And for larger cuts like whole chickens and roasts, we’re talking 20-30 minutes. Once rested, slice your meats against the grain to ensure optimal tenderness.
BONUS: Perfect BBQ Side Dishes and Sauces
Let’s not forget about the supporting cast! Round out your BBQ feast with some scrumptious sides like grilled veggies, coleslaw, potato salad, and cornbread. And for a final touch, serve up an array of heavenly homemade BBQ sauces. Happy grilling, y’all!
Getting to Know Your Grill
Before diving into the wonderful world of barbecuing, it’s important to understand the ins and outs of your grill. Familiarizing yourself with the various types of grills, practicing safety measures, and learning about grill zones will set you up for success and make your grilling experience nothing short of fantastic. So, let’s get fired up and explore these essential grilling tips!
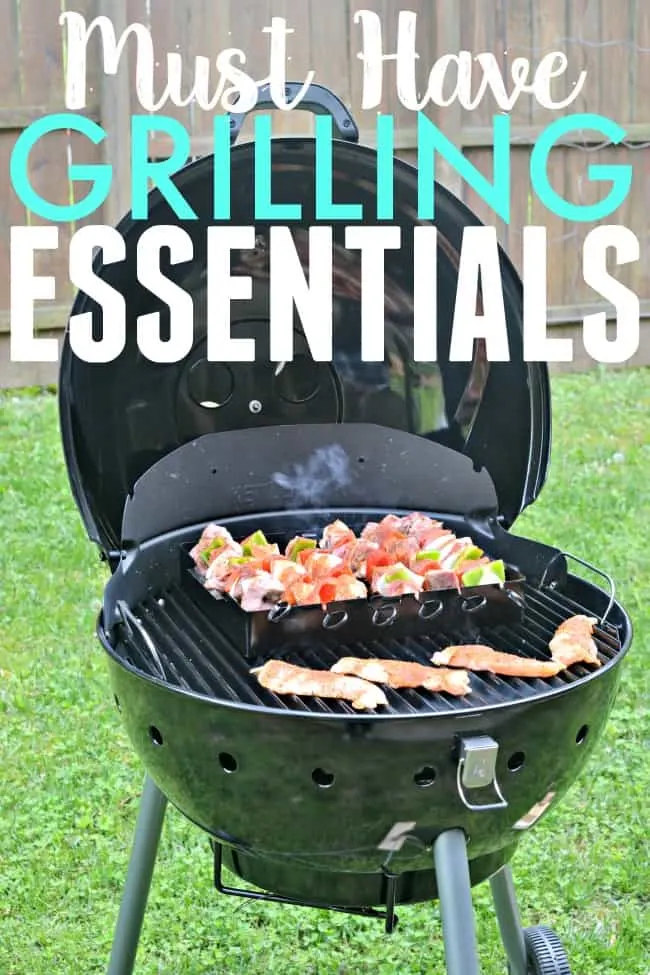
Different Types of Grills
There’s more to grilling than just tossing some meat on a hot surface. Different grills cater to different grilling styles, so knowing your options is key. Here are three main types of grills to help you figure out the best fit for your BBQ style.
Charcoal Grills: Arguably the most popular choice among BBQ aficionados, charcoal grills use charcoal briquettes or lump charcoal to produce that classic, smoky flavor we all know and love. However, they do require some extra prep time and cleanup compared to others.
Gas Grills: Convenient and user-friendly, gas grills use propane or natural gas as their fuel source. While they tend to heat up faster and maintain a consistent temperature throughout the cooking process, they generally lack the rich, smoky flavor of charcoal grills.
Pellet Grills: A bit of a new kid on the block, pellet grills use wood pellets to cook your grub and impart a delicious woody taste. They’re often thought of as the best of both worlds – offering the flavor of a charcoal grill with the convenience and temperature control of a gas grill.
Grill Safety Tips
Alright, let’s get serious for a hot second. Safety should always come first when dealing with an open flame (or any heat source, for that matter). Keep these safety tips in mind while you’re getting your grill on:
Inspect your grill: Before firing up, give your grill a once-over to ensure there are no leaks, rust, or damaged parts.
Location, location, location: Grill in a well-ventilated area and away from any flammable materials or structures.
Keep a fire extinguisher nearby: Accidents happen, so it’s best to be prepared for any flare-ups or other mishaps.
Always keep an eye on your grill: Don’t leave your grill unattended while cooking – those juicy steaks need your undivided attention (and so does fire safety).
Clean your grill regularly: Buildup of grease and food residue can lead to flare-ups, so be sure to clean your grill after each use.
Understanding Grill Zones
Ever wondered why your steaks sometimes come out unevenly cooked? Well, say hello to grill zones! Setting up different grill zones on your BBQ is essential for achieving perfect results. Here’s a quick breakdown of the three main zones:
Searing Zone: Also known as the “direct heat” zone, this is where your grill will be the hottest. Perfect for searing meats and getting those drool-worthy grill marks, this zone is usually achieved by placing the coals or burners directly underneath the grilling grate.
Cooking Zone: This area is cooler than the searing zone and provides indirect heat for slower, more even cooking. You can create a cooking zone by either pushing the coals to one side of the grill (for charcoal grills) or turning off one or more burners (for gas grills).
Warming Zone: The coolest part of the grill, the warming zone is typically located furthest away from the heat source. It’s ideal for keeping foods warm without overcooking them, or for starting off delicate items like vegetables and fish before finishing them on the direct heat zone.
Now that you’ve got the lowdown on your grill, you’re ready to tackle the rest of our 10 essential grilling tips and tricks for a perfect BBQ. So, go ahead and fire up that grill – your friends and family will be feasting on your delicious, expertly-grilled creations in no time!
Prepping Your Grill for Use
Before you fire up your grill for that perfect BBQ, follow these essential tips and tricks to get your grill ready for action. By cleaning, preheating, and oiling your grill, you’re setting yourself up for success on your grilling adventure!
Cleaning Your Grill
First things first, let’s get that grill squeaky clean! Nothing ruins a BBQ faster than those clingy remnants from your last grilling session. After all, you don’t want that gunk to end up on your delicious burgers, kebabs, or veggie skewers. So grab a brush or an old cloth, some warm, soapy water, and scrub away. If it’s been a while since your last clean, you might need a bit of elbow grease to get the job done.
Be picky with your cleaning. Make sure every nook and cranny is spotless, especially the grates. Rusty and dirty grates are a big no-no for BBQs. Once you’ve got it all spick and span, give it a good rinse, and let the grill air dry before moving onto the next step.
Pre-heating Tips
Just like you preheat an oven, don’t forget to preheat your grill. This step is crucial as it helps kill germs and ensure an even cooking temperature. Depending on the type of grill you’re using, whether it’s gas or charcoal, the preheating process will vary.
For gas grills, simply turn all the burners on high and close the lid, and let it heat for about 10-15 minutes. For charcoal grills, light your charcoal and wait until they’re glowing and covered with white ash before spreading them evenly and placing the grates on top. Once the grates are in place, let them heat for about 5 minutes to ensure a hot cooking surface.
Pro tip: A grill thermometer is your best friend in the preheating process: it’ll tell you when your grill has reached the desired temperature, ensuring you don’t overdo or undercook your food!
Oiling the Grill Grates for Non-Stick Results
Want to avoid those pesky grill marks or torn chunks of meat that just won’t slide off the grate? Say hello to the magical trick of oiling your grill grates! By doing this, you’ll not only make cooking a breeze, but you’ll also give your food a beautiful, crispy finish.
It’s as simple as dipping a folded paper towel into a high smoke point oil (vegetable, canola, or grapeseed oil work great!) and using a pair of tongs to rub the oil onto the grates. Be generous, but don’t douse the grates in oil – just enough to coat and create a non-stick surface. Be careful, though, as those grates are hot! You don’t want to burn your fingers.
And there you have it, folks! Your grill is prepped, hot, and ready to take on all the BBQ adventures that await you. Go on, get grilling, and enjoy the fruits of your labor!
Choosing the Best Fuel
When it comes to barbecuing, there’s more to it than just flipping a few burgers. The choice of fuel can significantly impact the taste of your grilled delights. Let’s discuss the pros and cons of various fuel options, helping you figure out which one suits your needs the best.
Charcoal Grilling
Ah, the classic choice! Many hardcore grill enthusiasts swear by charcoal grilling for that authentic, smoky taste. By using lump charcoal or charcoal briquettes, you can easily adjust the heat by spreading them out or piling them up. However, keep in mind that charcoal grilling might take a bit longer to get started and requires some skill and patience to master.
Gas Grilling
If convenience is your top priority, look no further than gas grilling. Using propane or natural gas, gas grills offer a quick, hassle-free grilling experience. Simply turn the knob, and you’re good to go! Plus, you’ll enjoy precise temperature control for exceptional results every time. On the flip side, gas grills can be pricey and, let’s face it – they might not give you the same smoky flavor as charcoal.
Pellet Grilling
Pellet grills are the new kid on the block, and boy, are they making a splash! These grills use hardwood pellets as fuel, providing you with a more eco-friendly option and mouth-watering wood-fired taste. Some even come with digital controls for temperature precision. However, be prepared to spend a bit more on both the grill and the pellets, and remember that they need an electrical outlet to function.
Comparing Fuel Types
In the end, the choice of fuel is all about personal preference.
If you’re after that classic, smoky flavor and don’t mind putting in a little extra effort, charcoal grilling is the way to go. Plus, let’s not forget that satisfying ritual of lighting up the charcoal!
Gas grilling, on the other hand, is perfect for folks who prioritize convenience and ease of use. With minimal setup and cleanup, you can fire up the grill and whip up a delicious meal in no time!
And last but not least, pellet grilling offers a unique combination of wood-fired taste and modern gadgetry. If you’re willing to invest in this trendy option, you might just find it’s the perfect middle ground between traditional and state-of-the-art grilling experiences.
So go ahead, explore the wonderful world of barbecuing, and find the perfect fuel for your needs. Happy grilling!
Selecting the Right Cuts of Meat
One of the most critical aspects of any great BBQ is choosing the best cuts of meat. To achieve that scrumptious, mouthwatering dish, you need to make smart choices when purchasing, preparing, and cooking your meats. Let’s dive into the top-notch options and tips for selecting the right cuts of meat for your grilling endeavors.
Best Cuts for Grilling
There are a plethora of meats available, but not all cuts are created equal when it comes to grilling. It’s essential to find cuts with a reasonably high-fat content, as the fats contribute to that juicy tenderness we all know and love. Here are some cuts to consider for your next BBQ:
Beef: Look for ribeye, T-bone, strip, and skirt steaks. These cuts have marbling—the white streaks of fat seen throughout the meat—that will make your grilling experience a tasty success.
Pork: Baby back ribs, pork chops, and pork shoulder are excellent choices for grilling. Go for the bone-in options when possible, as they help retain tenderness and lock in the smoky flavors.
Chicken: Opt for bone-in, skin-on chicken breasts, thighs, and drumsticks. The bone and skin will protect the meat from drying out during the grilling process.
Meat Thickness and Cooking Time
The thickness of your meat plays a crucial role in how long it needs to be cooked. A general rule of thumb is to grill thinner cuts, like skirt steaks or chicken breasts, on high heat for a shorter amount of time. On the other hand, thicker cuts such as ribs or pork chops need to be cooked on medium heat for a more extended period, giving it the chance to cook through without burning the outside.
Don’t shy away from using your trusty meat thermometer. Checking the internal temperature of your meat is the key to ensuring that it’s cooked to perfection, sealing in all that delicious smoky flavor.
Choosing Quality Meats and Sources
When it comes to selecting meats, quality matters! Always opt for fresh, locally sourced meats when possible. Whether you’re at your neighborhood butcher or grocery store, don’t hesitate to ask about the sources and freshness of the products. By doing so, not only will you be supporting local farmers and suppliers, but you’ll also notice the difference in flavor when using high-quality meats.
For beef, look for USDA Prime or Choice labeling, and for pork, try to find cuts labeled as natural or organic. These labels indicate that you’re getting top-quality, tender meats that are perfect for grilling.
By keeping these tips in mind when selecting your cuts for grilling, you’ll be sure to elevate your BBQ game to a whole new level. So the next time you fire up your grill, make sure you have the right meats, and you’ll be well on your way to a delicious, perfectly cooked meal to impress your friends and family!
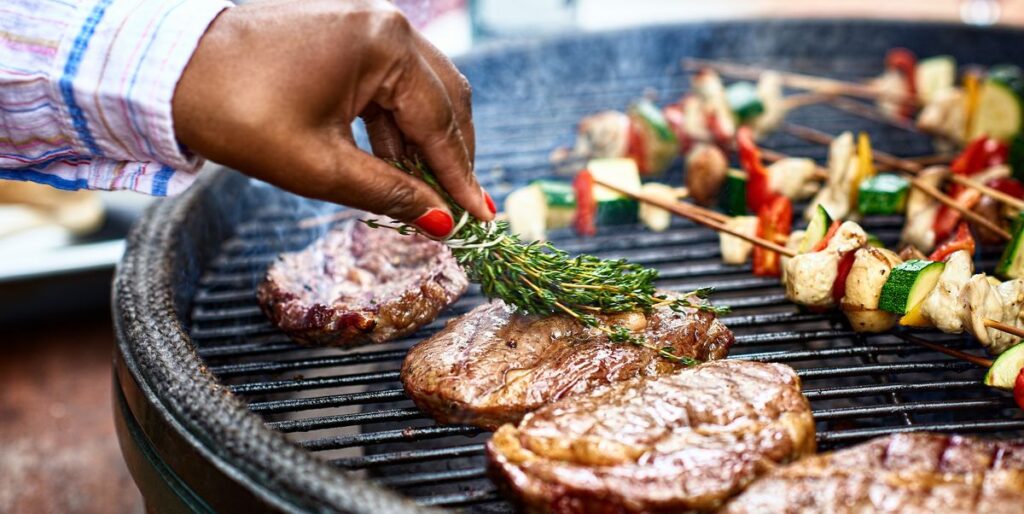
Marinating and Seasoning Techniques
One of the secrets to a perfect BBQ is mastering the art of marinating and seasoning your meats (and veggies, for that matter!). From creating mouth-watering marinades to dishing up delectable dry rubs, we’ve got you covered in this section.
Creating Flavorful Marinades
So, you wanna know the secret to a killer marinade? It’s all about balance, folks. You’ll want to combine flavors that bring out the best in your ingredients, while also complementing the smokiness of the grill. Here’s the lowdown:
Start with an acid: This helps tenderize the meat and enhance its flavor. We’re talkin’ vinegar, lemon juice, or even some wine if you’re feeling fancy.
Add some oil: This will help keep your food moist and also carry the flavors throughout. Olive oil, canola oil, or even sesame oil can work well – take your pick!
Season it up: Bring in the flavor heroes, like garlic, onion, herbs, and spices. Don’t be afraid to get creative – after all, you’re the boss of your BBQ!
Sweeten the deal: Sweet ingredients, like honey, maple syrup, or brown sugar, can round out the flavors of your marinade and contribute to a perfect caramelization on the grill.
Simple Dry Rubs and Seasoning Ideas
Dry rubs are a fantastic way to add flavor to your grilled dishes without all the extra fuss of marinating. All you gotta do is combine your chosen herbs and spices, rub ’em onto your meat or veggies, and let the magic happen on the grill. Here are some surefire hits that’ll make your taste buds sing:
BBQ Classic: Mix paprika, brown sugar, black pepper, salt, and garlic powder for an all-purpose rub that’s perfect for ribs, chicken, or even veggies.
Mediterranean Magic: Combine rosemary, thyme, oregano, garlic powder, onion powder, and salt for a delish rub that’ll transport you right to the Mediterranean.
Spicy Southwestern: Combine chili powder, cumin, coriander, oregano, garlic powder, onion powder, and salt for a fiery rub that’ll set your taste buds ablaze.
Sweet and Smoky: Mix smoked paprika, brown sugar, cinnamon, cayenne pepper, and salt for a flavorful rub that balances sweet and smoky goodness.
Marinating Time and Tips
Alright, now that you’ve got your marinades and rubs sorted, let’s get down to business:
Plan ahead: You’ll want to give your marinated food ample time to soak up all that goodness. Aim for 2 to 4 hours for smaller cuts, or up to a full day (24 hours) for larger cuts of meat.
Keep it cool: Refrigerate while marinating to ensure food safety and optimum flavor absorption. Don’t marinate at room temperature!
Easy on the salt: While some salt can be a flavor enhancer, too much can draw out moisture from your food and make it tough. Be mindful of your salt use in both marinades and dry rubs.
Don’t reuse marinades: If you’re planning to brush some extra sauce onto your food while it cooks, set aside a portion of your marinade before adding your meat or veggies. This will ensure you don’t spread any bacteria from the raw ingredients.
And there you have it – with these marinating and seasoning tips in your back pocket, you’re well on your way to grilling up some seriously scrumptious BBQ that’ll have your guests begging for seconds!
Proper Grill Temperature Management
When it comes to grilling, mastering the art of temperature management is essential for achieving that perfect BBQ. Whether you’re a grilling rookie or a seasoned chef, these tips and tricks will help take your temperature control game to the next level.
Direct vs. Indirect Heat
First things first: you’ve got to know the difference between direct and indirect heat when grilling. Direct heat refers to cooking your food directly over the heat source – think of it as your fiery grill’s version of the fast lane. It’s perfect for searing steaks and chops or quickly cooking thinner cuts of meat and veggies.
On the other hand, indirect heat is all about cooking your food next to – not directly over – the heat source. Think low and slow, such as when you’re tackling thicker cuts of meat or achieving that perfect fall-off-the-bone tenderness for your ribs. To achieve indirect heat, simply ignite only half of your grill’s burners or push the coals to one side.
Using a Temperature Gauge or Thermometer
Now that you’ve got the hang of direct and indirect heat, let’s chat about grill temperature! Most grills come equipped with a built-in temperature gauge, but keep in mind that these gauges may not offer the most accurate reading. To truly become a grill-master, invest in an instant-read thermometer – your steaks and burgers will thank you.
By keeping a close eye on your grill temperature, you’ll be able to make adjustments as needed and prevent potential disasters from ruining your BBQ. Remember, it’s usually easier to increase the heat rather than trying to cool down a grill that’s already scorching hot!
Adjusting Grill Temperature
So, how do you make those all-important temperature adjustments, anyway? Well, that depends on whether you’re rocking a gas grill or going old school with charcoal. For gas grills, simply adjust the burners to control the heat – higher settings will quickly raise the heat, while lower settings will cool things down.
Dealing with a charcoal grill? Then it’s all about the air vents, my friend. More airflow means hotter coals, so open those vents to crank up the heat. To cool things down, partially close the vents – but be careful not to snuff out your fire completely. And, if you ever need to make bigger adjustments, you can always add more coals (for more heat) or spread the existing coals further apart (to reduce the heat).
By adding these grilling tips and tricks to your repertoire, you’ll be well on your way to achieving perfect BBQ every time. Managing the temperature of your grill might seem like a daunting task, but with practice, it’ll soon become second nature. Happy grilling!
Flipping and Turning Techniques for Even Cooking
A perfect BBQ party is never complete without deliciously grilled food items. While cooking, flipping and turning the food items evenly on the grill is of utmost importance to get the perfect taste and aroma from them. Let’s see how we can master these techniques to attain BBQ nirvana, shall we?
Proper Use of Tongs and Spatulas
First things first, you should know how to use the right tools for flipping and turning. For most of the meat items, like chicken pieces, steaks, or sausages, using a sturdy pair of tongs is a great option. They allow you to grip the food with ease, ensuring a swift flip without disturbing the grill marks.
However, when it comes to flipping delicate items like burgers or fish, a wide spatula does the job better. Gently slide the spatula under the food item and flip it over with ease. But be careful not to press the spatula too hard onto the food, as it can squeeze out its juices and dry it out.
Avoiding Over-flipping and Turning
Alright, now that you’ve got the right tools, it’s time to learn the art of not flipping. Surprisingly, the secret to grilling success is actually flipping and turning the food as little as possible. Over-flipping can cause the meat to cook unevenly and can affect those beautiful grill marks we all love.
Instead, exercise patience and let the food items cook till they’re ready to be flipped. A general rule of thumb is to flip only once during the cooking process, but if you want to achieve those perfect crosshatched grill marks, you’ll need to rotate the food at a 45-degree angle on the grill, and then flip it to repeat the process on the other side.
Checking for Consistent Grill Marks
Now that you’re limiting the flips, you can focus on making consistent grill marks. To achieve this, place your meat item diagonally along the grill grates. After a couple of minutes, rotate it 45 degrees without flipping it. After another two minutes or so, it’s time to flip, repeating the process for the other side.
Keep in mind that the food might stick to the grates initially – that’s totally normal! It usually releases itself once it’s ready to be flipped or rotated. Remember to patiently wait for that moment; you don’t want to tear the meat by forcefully pulling it off the grates.
There you have it, folks – the ins and outs of flipping and turning techniques for even cooking on the grill. Go ahead and wow your friends and family at your next BBQ party with your newly acquired skills. Happy grilling!
Managing Flare-Ups and Smoke
Flare-ups and smoke are inevitable when you’re mastering the art of grilling. But have no fear! We’ve got you covered with some fantastic tips and tricks to prevent and control flare-ups, as well as using smoke to enhance your BBQ’s flavor. So, let’s dive in, shall we?
Causes of Flare-Ups
First things first, let’s talk about the root cause of flare-ups. They typically occur when fat or grease from your food drips onto the flames or hot coals. As a result, a burst of flames flares up, potentially charring your perfectly grilled meal. Yikes, right? Now that we’ve identified the enemy, let’s explore ways to prevent and manage these fiery nuisances.
Preventing and Controlling Flare-Ups
Here are some surefire tips to prevent flare-ups and keep your meal from ending up in smoke:
- Trim the fat: Before grilling, trim excess fat from meat to minimize the chances of flare-ups. However, be sure to leave a little fat for flavor.
- Use a drip pan: Place a drip pan under the grates to catch drippings and keep them away from the flames. This not only prevents flare-ups but also makes for easier cleanup.
- Preheat and clean your grill: It’s a no-brainer, folks! Before grilling, preheat your grill and clean it properly to remove leftover grease and debris that could fuel flare-ups.
- Keep the lid closed: When you’re not flipping burgers or basting your ribs, keep the grill lid closed. This reduces the amount of oxygen available to the fire, lessening the chances of flare-ups.
- Use indirect heat: Cooking your meat away from the direct heat source will give you more control over your temperature and reduce the likelihood of flare-ups.
- Be prepared: Keep a spray bottle full of water handy. In case of a flare-up, give it a quick spritz to douse the flames without drenching your food.
Using Smoke for Flavor Enhancement
Now that we’ve mastered flare-up prevention let’s embrace the power of smoke for mouth-watering flavor enhancement. When smoking food using a charcoal or gas grill, try these tricks for a tantalizingly tasty result:
- Choose your wood wisely: The type of wood you use can make all the difference! Various woods impart different flavors, so experiment with combinations like hickory and applewood for a tantalizing taste.
- Soak your wood: Soak wood chips in water for about 30 minutes before placing them on your hot coals or gas grill’s flavorizer bars. This will help create more smoke, which means more flavor!
- Maintain temperature: Keep your grill temperature between 225-250°F (107-121°C) for low and slow smoking. Pay close attention to your grill’s thermometer and adjust as needed.
- Go light on the smoke: Too much smoke can overpower your food, so don’t go overboard! A little can go a long way in enhancing your BBQ’s flavor.
So there you have it! With a little know-how and some trial and error, you’ll be grilling like a pro in no time. Follow these tips, and you’ll be the envy of your fellow grillmasters. Happy grilling!
Determining Doneness and Safe Cooking Temperatures
No BBQ is complete without tender, juicy, and perfectly cooked meat. But how can you be sure that your meat is cooked to perfection? The key lies in knowing the right internal temperatures for different types of meat and learning how to check for doneness. So, let’s dive right in and explore the do’s and don’ts of perfectly cooked BBQ!
Safe Internal Temperature Guidelines
To ensure your meat is cooked to a safe temperature—where harmful bacteria are killed—you need to familiarize yourself with these guidelines. Note, the USDA recommends these internal temperatures:
- Poultry (chicken, turkey, duck): 165°F (74°C)
- Ground meats (beef, pork, lamb): 160°F (71°C)
- Beef, pork, lamb, and veal (steaks, chops, roasts): 145°F (63°C) followed by a 3-minute rest
- Fish: 145°F (63°C)
Keep these temperatures in mind and don’t hesitate to consult a trusty meat thermometer if you’re in doubt.
Checking Meat Temperature
Now that you’re familiar with safe internal temperatures, let’s talk about how to check meat’s temperature. Using a digital meat thermometer is one of the most reliable methods. Simply insert the probe into the thickest part of the meat, making sure not to touch any bones or gristle. Give it a few seconds to provide an accurate reading, and viola—you’re good to go!
If pretty please, keep in mind that factors such as the type and size of the cut, the temperature of the grill, and even wind and air temperature can affect cooking times. So, it’s always a good idea to check the temperature earlier than you think necessary.
Visual and Tactile Tests for Doneness
While using a meat thermometer is undoubtedly the most foolproof way to test for doneness, there are some alternatives you can try in a pinch. These visual and tactile tests can help you achieve BBQ greatness in no time!
Color: Cut into the meat to check for the desired color (ranging from pink to brown) and consistency. Keep in mind, though, that color isn’t always an accurate indicator—especially for ground meats.
Texture: Press on the meat with your finger or tongs to gauge its firmness. As a general rule, the firmer the meat, the more well-done it is. But be careful with this method—while it might work for steak, it won’t give you an accurate reading for chicken or other poultry.
Juiciness: When you squeeze the meat, juices should run clear as opposed to pink or red. This is a particularly useful method for checking poultry doneness.
The ‘Poke Test’: For steak connoisseurs, try the “poke test” by comparing the meat’s firmness to the fleshy part of your hand (under your thumb). With your hand relaxed, prod that area: that’s what a rare steak feels like. Now, touch your thumb and pointer finger: the area under your thumb becomes slightly firmer, similar to medium-rare steak. Continue comparing your hand’s firmness as you touch each fingertip, all the way to your pinky—which represents a well-done steak. Fancy, right?
By combining the safe internal temperature guidelines with trusted techniques to check for doneness, you’ll be one step closer to grilling up the perfect BBQ. Happy grilling!
Resting and Slicing Your Cooked Meat
After grilling up a storm, it’s tempting to dive straight into your meaty feast. But hold your horses! The secret to tender, juicy, and flavorful meat lies in two crucial steps: resting and slicing. Don’t worry, we’ll walk you through them so you can be the BBQ master of your neighborhood!
Why Resting Meat is Important
If you’ve ever wondered why professional chefs always insist on letting their grilled meats rest, it’s not just to torture your taste buds! Allowing the meat to rest helps the juices redistribute and absorb back into the fibers. You see, the grilling process forces the juices towards the center of the meat, making the exterior dry and the center moist. By giving it a breather, you allow the flavorful juices to even out and the muscles to relax, thus giving you a tender, succulent bite. Trust us, it’s worth the wait!
Proper Resting Time and Conditions
There’s no one-size-fits-all resting time, but a good rule of thumb is to rest your meat for about 5 to 10 minutes for every inch of thickness. Here are some general guidelines:
- For steaks and chops: Rest 5-10 minutes
- For chicken breasts and thighs: Rest 10-15 minutes
- For larger cuts, like a full chicken or a rack of ribs: Rest 15-30 minutes
And how do you rest your meat, you ask? Well, first off, don’t cover it with foil! That’ll create steam, leading to soggy meat. Instead, transfer the meat to a warm plate or cutting board and tent it loosely with foil to retain the heat. Resist the urge to poke or prod it, as this could cause those precious juices to escape.
Slicing Tips for Maximum Tenderness and Presentation
Once your meat has had its beauty sleep, it’s time for the pièce de résistance – slicing! Follow these tips for the perfect cut:
Sharp knives are key. Ensure you have a sharp, non-serrated knife (a chef’s knife or carving knife will do the trick) for a clean, precise cut.
Slice across the grain. This is hands-down the most important step to ensure tenderness. The grain refers to the muscle fibers, which run in a certain direction. By slicing across them (perpendicular to the grain), you shorten them, making the meat more tender and easier to chew. Use your eyes to identify the grain and take your time to slice carefully.
Thickness matters. Depending on the type of meat, the thickness of your slices makes a difference. For steaks and chops, aim for about 1/4 to 1/2-inch thick slices. For chicken, slice on a bias (angled cut) so you have wider, thinner slices. For larger cuts like brisket or tri-tip, go for 1/8 to 1/4-inch thick slices.
Now that you’re equipped with these resting and slicing techniques, it’s time to enjoy your BBQ masterpiece. Remember, practice makes perfect, so keep on ‘queing and impress your friends and family with your newfound skills. Happy grilling!
BONUS: Perfect BBQ Side Dishes and Sauces
Apart from having your grilling game on point, you can’t forget the importance of adding scrumptious side dishes and mouth-watering sauces to your BBQ spread. After all, it’s a party in your mouth, and you want to ensure that your guests rave about the spectacular smorgasbord you’ve laid out!
Classic BBQ Sauce Recipes
If you want to whip up a finger-lickin’ good barbecue sauce, it’s all about having the right balance of flavors. You should seriously consider making one or more of these tried-and-true classics:
Sweet and Tangy BBQ Sauce: Combine ketchup, brown sugar, apple cider vinegar, Worcestershire sauce, and your choice of spices. This classic sauce will add a delicious zing to your grilled meats.
Smoky Hickory BBQ Sauce: By mixing liquid smoke with your ketchup and brown sugar base, you can achieve an incredible depth of smoky goodness that tastes like it was made by an expert pitmaster.
Spicy Chipotle BBQ Sauce: Add some heat to your BBQ sauce with some canned chipotle peppers! Mix in adobo sauce for a smoky and spicy kick that’ll wake up your taste buds.
Remember, feel free to get creative with your sauce recipes! Experiment with different spices and flavors to create a unique BBQ sauce that’ll have your guests coming back for more.
Side Dish Ideas for Grilled Meals
Great BBQ isn’t just about the meat. You’ve got to have some tasty side dishes to round out your meal. Here are some fantastic ideas that’ll complement your barbecued bites:
Grilled Veggies: Simply toss your favorite vegetables in olive oil and your choice of seasonings, then toss them on the grill alongside your meat for a healthy and delicious side dish.
Coleslaw: This crunchy and tangy salad is a BBQ staple. Mix shredded cabbage and carrots with a dressing made of mayo, vinegar, sugar, and spices for a side dish that balances well with your BBQ.
Baked Beans: Slow-cooked in a sweet, tangy tomato sauce, baked beans are an indispensable side dish for any barbecue. You can even jazz up a canned version by adding chopped onions, bacon, and your favorite spices.
Macaroni Salad: A bowl of creamy, chilled macaroni salad is the perfect companion for your grilled meats. Toss cooked macaroni with mayo, diced veggies, and your preferred seasonings for a flavorful summertime side dish.
Grilled Corn on the Cob: Nothing says summer like grilled corn on the cob. Simply brush with melted butter, season with salt, pepper, and any other spices you like, then wrap in foil and throw it on the grill.
Pairing Side Dishes and Sauces with Your Grilled Mains
Once you’ve mastered the art of grilling and have your scrumptious side dishes prepared, it’s time to put it all together. The secret to creating a BBQ meal that’s out-of-this-world delicious lies in the perfect pairing of your grilled meats with the right side dishes and sauces.
Here are a few suggestions to help you create a drool-worthy BBQ spread:
Ribs: Serve with a tangy homemade BBQ sauce, coleslaw, and baked beans. The combination of flavors will be a match made in heaven.
Chicken: Grilled veggies, macaroni salad, and a deliciously creamy garlic dipping sauce make the perfect companions for your BBQ chicken.
Burgers and Hot Dogs: Go classic with a smoky hickory BBQ sauce, grilled corn on the cob, and a creamy potato salad.
Now that you’ve got the basics down, it’s time to fire up your grill and get ready to impress your friends and family with your masterful BBQ skills and perfectly paired side dishes and sauces. Happy grilling!
Frequently Asked Questions
How do I get the perfect sear on my grilled meat?
Achieving that perfect sear on your grilled meat is crucial, and it’s easier than you think! First, make sure your grill is hot enough. An ideal temperature is around 450 to 550°F. Next, pat your meat dry to remove any excess moisture, and brush it with a little oil. This will help create a beautiful, brown crust. Lastly, resist the temptation to move the meat around too much – it just needs flipping once. Patience is the key to nailing that perfect sear, and it’s well worth the wait!
What are some healthy grilling options?
Grilling is often associated with burgers and hot dogs, but you’re not limited to those choices! There are plenty of healthy options for your BBQ menu, such as lean meats like skinless chicken breasts and turkey burgers. Fish like salmon and shrimp also make delicious grilled meals. For sides or meatless options, consider grilling vegetables like asparagus, bell peppers, and zucchini, or even fruit like pineapple or peaches for a sweet and smoky dessert.
How can I keep my grill in good condition?
A well-maintained grill will have you enjoying BBQ season for years to come. To keep your grill in tip-top shape, make sure to follow these steps:
- Clean your grill grates after each use by scrubbing with a grill brush while it is still warm to remove any stuck-on residue.
- Empty the grease tray regularly to prevent flare-ups and potential fires.
- Inspect your grill for rust and address any spots by scrubbing with steel wool and coating with high-heat paint.
- Protect your grill from the elements when not in use by investing in a quality cover.
- Lastly, give your grill a deep cleaning once or twice a season, depending on your level of use.
What are the best grilling tools and accessories?
Having the right tools can make all the difference when grilling. Here are some essential accessories to elevate your BBQ game:
- A long-handled spatula and tongs are a must for flipping and turning your food safely.
- A quality grill brush is crucial for keeping your grates clean and preventing stuck-on food.
- A meat thermometer ensures your meat is cooked to perfection and safe to consume.
- A grill basket will allow you to cook smaller items like vegetables and shrimp without losing them through the grates.
- An instant-read thermometer provides quick and accurate temperature readings for perfectly cooked meat every time.
Can I grill fruits and vegetables for a BBQ?
Absolutely! Grilling fruits and vegetables adds amazing flavor and variety to your BBQ meals. Vegetables like bell peppers, zucchini, asparagus, and corn are excellent choices for grilling, as they become tender and charred while retaining their delicious taste. Fruits like pineapple, peaches, and even watermelon can be grilled to create a caramelized, smoky sweetness. Experiment with different combinations and seasonings to find your favorite grilled fruit and veggie dishes.
Amazon and the Amazon logo are trademarks of Amazon.com, Inc, or its affiliates.