As an Amazon Associate I earn from qualifying purchases.
Assessing Your BBQ Grill’s Condition
Before diving into the nitty-gritty of grill maintenance, let’s start by assessing the overall condition of your BBQ grill. Just like any other piece of equipment that’s constantly exposed to heat, grease, and outdoor elements, your grill will experience some wear and tear over time. Knowing the status of your grill will help you determine the appropriate steps to get it back in tip-top shape.
Visual Inspection: Checking for Wear and Tear
Let’s start by doing a thorough visual inspection of your grill. Check for any obvious signs of damage or wear, such as rust, cracks, or peeling paint. Don’t forget to inspect the legs or wheels to make sure they’re in good shape and able to support the grill properly.
While a bit of rust or peeling paint might seem like merely cosmetic issues, they can potentially compromise the structural integrity of the grill, as well as being unsightly. Plus, no one wants rust flakes falling into their delicious BBQ feast, right?
Examining BBQ Grill Components: Grates, Burners, and More
Next, let’s delve into your grill’s components. Here’s a rundown of what to look for:
- Grates: Check for any significant build-up of grease or food particles, which could cause uneven cooking or flare-ups. Don’t ignore signs of rust or damage either. With time, even high-quality grates can wear out and may need replacing.
- Burners: On a gas grill, the burners are crucial for proper heat distribution. Ensure there’s no debris blocking the flow of gas and that the burner holes aren’t corroded or damaged. For charcoal grills, ensure that the charcoal grate is in good condition.
- Ignition: Make sure the ignition system is functioning correctly, and all the wiring is in good shape. A faulty ignition system can create fire hazards.
- Flame Tamers: These little fellas are responsible for evening out the heat across the cooking surface and protecting your burners from grease. Make sure they’re clean and in good working order.
Keep in mind that it’s not just about the physical components of your grill. A good barbecuing experience is as much about the functionality as it is about the flavor. That’s why it’s essential to inspect your grill’s smoke and heat control systems – from dampers to air vents – to ensure they’re working as intended.
The Importance of Regular BBQ Maintenance and Inspection
A little elbow grease goes a long way, and that couldn’t be truer when it comes to BBQ grill maintenance. By regularly inspecting, cleaning, and taking proper care of your grill, you’ll not only extend its lifespan but also improve your overall grilling experience. Trust us, your taste buds will thank you!
To keep your BBQ grill in top shape, we recommend a thorough inspection and cleaning at least twice a season. This will help you stay on top of any potential issues, avoid safety hazards, and ensure your grill is always performing at its peak. After all, a well-maintained grill is a happy grill, and nothing beats the satisfaction of firing up a perfectly clean and ready-to-go BBQ on a beautiful sunny day!
Cleaning Your BBQ Grill
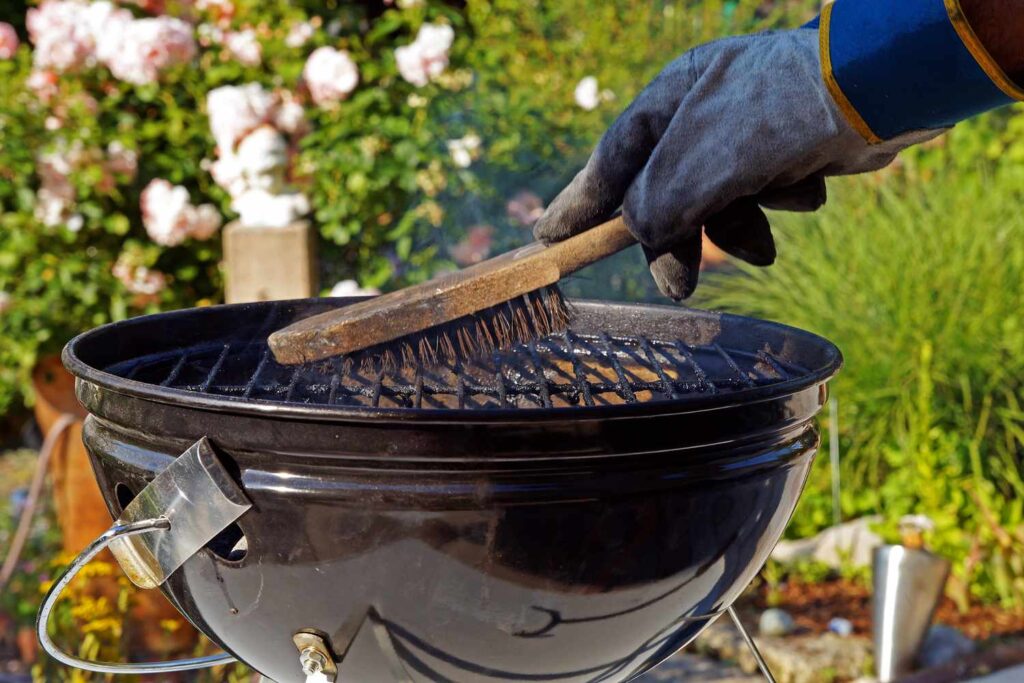
A clean and well-maintained BBQ grill is essential not only for the flavourful dishes you want to prepare, but also for the health, safety, and longevity of your much-loved outdoor cooking buddy. Don’t worry! We’ve got you covered with all you need to know about keeping your grill spick and span.
Step-by-Step Guide to Cleaning a Charcoal Grill
Ah, the good old charcoal grill. The smoky aroma, the classic taste – there’s something special about charcoal grilling. But let’s face it; cleaning it can be a bit of a hassle. Anyway, here’s our step-by-step guide to help you keep your charcoal grill in tip-top shape:
Empty the grill: Wait until the coals are cold, then use a grill brush or scraper to remove any excess food and ash. Make sure to dispose of the ashes safely – never put hot ashes in the trash!
Remove the grates: Pop ’em off and give them a thorough scrubbing with a grill brush or a nylon pad using warm, soapy water. Remember to rinse them well.
Clean the inside: With your trusty grill brush, scrub the inside of the grill, removing any remaining gunk or burnt-on remnants. Place the gunk in a garbage bag.
Wipe it down: Use a sponge or damp cloth to wipe down the entire inside of your grill. Make sure it’s completely dry before moving on.
Reassemble: Replace your now-clean grates, and voilà! Your charcoal grill is ready for action.
How to Clean a Gas Grill: Top Tips and Techniques
Gas grills might be a bit less fussy than their charcoal counterparts, but they still need some TLC. Here are our top tips for cleaning your gas grill:
Turn off the gas: This one’s a no-brainer, but you’d be surprised how easy it is to forget. Safety first!
Remove the grates and burners: Like with a charcoal grill, remove the grates and give them a good scrub using a grill brush or a nylon pad and warm, soapy water.
Scrub the burners: Using a wire brush or a pipe cleaner, clean out any debris or grease from the burners.
Clean the cookbox and drip tray: Using your grill brush or a nylon pad, scrub the cookbox and any other surfaces inside the grill. Then empty and clean the grease tray or drip pan with warm, soapy water.
Wipe it down and reassemble: Wipe down the entire grill, making sure it’s completely dry, then put everything back in its proper place.
Removing Grease and Grime: Essential BBQ Grill Cleaners
You know what they say: you can’t do the job without the right tools. Here are some of the grill-cleaning essentials you’ll want in your arsenal:
- Grill brush (preferably with stainless steel bristles)
- Nylon pad
- Warm, soapy water
- Pipe cleaner or wire brush for cleaning gas burners
- Sponge or damp cloth
Remember, no job is too tough for the combined forces of these handy dandy tools!
The Benefits of a Clean Grill: Improved Cooking Performance and Safety
Now that you’ve got your grill all cleaned up and looking pretty, it’s time to enjoy the fruits of your labor! A clean grill not only means a better overall cooking experience (no burnt, stuck-on remnants or flare-ups) but also ensures the health and safety of your family and friends.
Plus, a well-maintained grill lasts longer, so you can keep on grilling those delicious dishes for years to come. Happy grilling, folks!
Maintaining BBQ Grill Components
A well-maintained BBQ grill is the key to successful grilling and delicious meals. Ensuring your grill components are in top shape not only prolongs the life of your BBQ, but also guarantees the best taste and safety. In this section, we’ll discuss maintaining the essential components of your grill, including grill grates, burners, and the exterior.
Grill Grates Maintenance: Cleaning Tips and Material Considerations
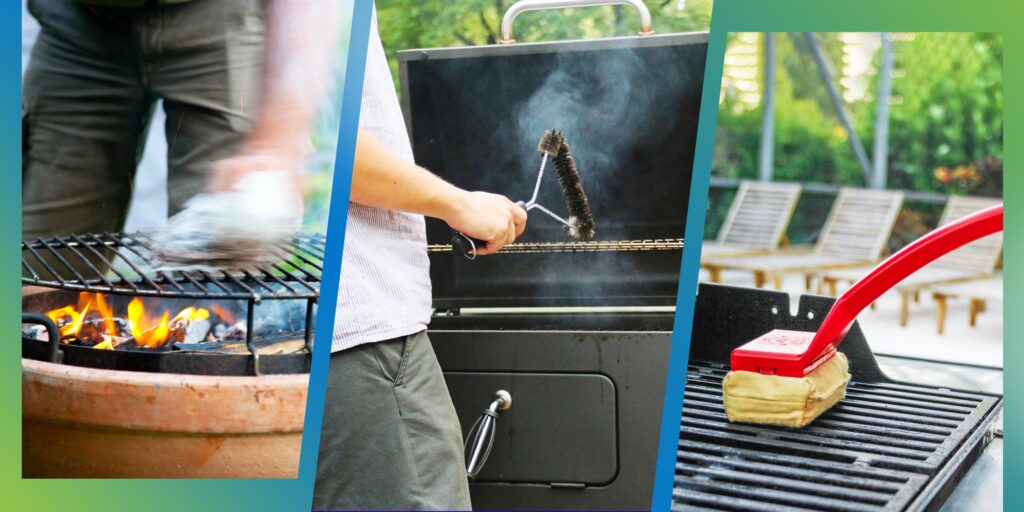
The grill grates are where the magic happens, so it’s critical to keep them clean and well-maintained. Not only does this prevent food from sticking, but it also helps keep your food from being tainted with the taste of last week’s cookout.
Preheat your grill to high heat for about 15 minutes. This will help loosen any stuck-on debris.
Turn off the burners and allow the grates to cool down for a few minutes.
Use a grill brush to scrub away any residue. Remember to choose a brush compatible with your grill grate material. For example, brass bristles are gentler on porcelain-enameled and ceramic grill grates, while stainless steel brushes are suitable for stainless steel and cast-iron grates.
After brushing, use a damp cloth to remove any leftover debris or ash.
Dry the grates completely before reassembling the grill.
Additionally, it’s essential to season your cast-iron or stainless steel grates to prevent rusting and improve their non-stick capabilities. Simply coat the grates with a high-heat cooking oil, heat the grill to medium-high heat, and let it sit for about 20 minutes. Your grates will develop a protective oily layer over time, enhancing their performance.
Burner Maintenance: Preventing Rust and Debris Build-Up
Properly functioning burners are crucial for even heat distribution and safe cooking. To avoid any dangerous flare-ups and maintain an efficient BBQ, pay close attention to the well-being of your burners.
Turn off the gas supply and allow the burners to cool completely.
Disassemble the burners by removing their attachments. Refer to your grill’s manual for detailed instructions.
Use a soft brush or cloth to remove any debris from the outside of the burners.
For tube burners, use a straightened paper clip or grill-specific venturi brush to clear debris from the small vent holes.
For cast-iron burners, check for rust and use a wire brush to gently scrape away any loose flakes.
Inspect the burners for any damage, such as cracks or large rust spots. If there are visible damages, consider replacing the burners.
Reassemble the burners, making sure all connections are secure.
It’s recommended to inspect and clean your grill burners at least once a year or more frequently based on your grilling frequency.
Taking Care of Grill Exterior: Paint, Surface, and Finish
While the interior components have the most direct impact on your grilling results, maintaining the exterior of your BBQ is also vital for its overall appearance, longevity, and safety.
For painted surfaces, avoid using harsh chemicals or abrasive materials, as they can damage the paint. Instead, use a mild soap and water solution with a sponge or soft cloth to clean the exterior. Rinse with clean water and dry with a soft cloth.
Stainless steel exteriors can be cleaned with a stainless steel cleaner or a mixture of mild soap and water. Remember to always clean in the direction of the grain to minimize the risk of scratching.
For cast aluminum surfaces, use a non-abrasive cleaner and a soft cloth to clean. Rinse and dry thoroughly.
Inspect your grill’s hoses, regulators, and connections for any signs of damage or leaks. Replace them promptly if any issues arise.
Keep your grill covered when not in use to protect it from rain, sun, and other elements that can cause damage.
In conclusion, taking care of your BBQ grill components is essential for maintaining a safe, efficient, and delicious grilling experience. With regular cleaning and inspection, you can keep your grill performing at its best for years to come. Remember to always read your grill’s manual for brand-specific recommendations. Happy grilling!
BBQ Grill Gas System Maintenance
A well-maintained BBQ grill is essential for safe and enjoyable grilling. One critical aspect of BBQ maintenance is the gas system, which can pose hazards if not properly cared for. In this section, we’ll cover essential gas system maintenance, including safety checks, detecting gas leaks, and replacing damaged components.
Safety Checks: Inspecting Gas Hoses and Connections
First things first, let’s talk about safety checks. Regularly inspecting the gas hoses and connections on your BBQ grill is crucial in preventing potential accidents. Look for any visible signs of wear and tear, such as cracks or brittleness in the hoses. Also, check the connections to ensure they are tight and secure.
Some folks might tell you to use soapy water to see if there’s a leak, but that trick doesn’t always work, especially on a windy day. Instead, invest in a proper gas leak detector spray – it’ll make your life a whole lot easier.
Remember, prevention is better than cure. Take care of your BBQ, and you’ll be rewarded with delicious, hassle-free grilling sessions.
Detecting Gas Leaks: Signs and Symptoms
Ever heard that unmistakable hissing sound coming from your BBQ? Yup, that might be a gas leak. If you can hear the gas flowing and your grill isn’t even turned on, you’re in for some trouble.
Gas leaks are no laughing matter, as they can lead to fires or even explosions. It’s essential to be aware of the signs and symptoms. Some common indicators of a gas leak are:
- The aforementioned hissing sound
- A strong smell of gas near your BBQ
- Your BBQ’s burners are not producing flames properly
If you suspect a gas leak, switch off the grill immediately. Unplug the gas hose and move the tank away from the area to prevent any further danger. The wind can easily carry sparks, so it’s better to be safe than sorry.
Replacing Damaged Gas Components: Hoses, Regulators, and Tanks
Sometimes, faulty components can cause gas leaks or other BBQ issues. It’s important to know when it’s time to replace these components to keep your BBQ functioning safely and effectively.
If you’ve noticed any damage to your gas hoses, don’t hesitate to replace them. Same goes for any worn-out regulators – after all, these bad boys control the gas flow to your grill. Lastly, watch out for any dents or rust on your propane tank. These signs may indicate it’s time for a new one.
Keep in mind that propane tanks have an expiration date too – usually around 12 years from the manufacture date. Yeah, we know, it’s a bummer, but hey, at least you’ll have the peace of mind knowing your BBQ is safe and ready to rock.
In conclusion, maintaining your BBQ grill’s gas system is an essential part of keeping your grilling experience safe and enjoyable. By regularly inspecting hoses and connections, detecting gas leaks, and replacing damaged components when necessary, you can ensure your grill stays in tip-top shape and is ready for those epic backyard cookouts. Happy grilling, folks!
Storing Your BBQ Grill
We all love firing up the grill for a delicious BBQ feast with our friends and family. However, to ensure our grills last for years to come, proper storage and maintenance are essential. In this section, we’ll cover outdoor grill storage, indoor grill storage tips, and the best BBQ grill covers.
Outdoor Grill Storage: Protecting Your Grill from Weather Damage
While it’s tempting to leave your grill outside during the warmer months, it’s important to remember that weather elements can cause damage over time. Rain, sun, and wind can all take a toll on the grill’s exterior and its components. To keep your grill in top shape, consider these outdoor grill storage tips:
- Invest in a heavy-duty, waterproof grill cover to protect your grill from moisture.
- Store your grill in a covered area, such as a patio or gazebo, to shield it from sun and wind damage.
- Ensure the grill is placed on a level, sturdy surface to prevent it from tipping over in strong winds.
- Clean and oil the grill grates regularly to prevent rust, especially if you live in a humid climate.
Indoor Storage Tips: Keeping Your Grill Safe and Clean
If you have the space to store your grill indoors, it’s a great way to keep it safe from weather-related damage. Here are a few tips for indoor grill storage:
- Before you bring your grill indoors, allow it to cool down completely to prevent any fire hazards or damage to your floors.
- Clean your grill thoroughly before storage to prevent lingering odors and debris.
- Keep your grill on a flat and non-flammable surface to prevent any accidents. If possible, use a grill mat to catch any drips or spills.
- Disconnect and remove the propane tank, and store it in a well-ventilated area. Propane tanks should never be stored indoors, as this poses a significant safety risk.
Using BBQ Grill Covers: Material Options and Fit
A high-quality BBQ grill cover is one of the best investments you can make to protect your grill from the elements and extend its lifespan. When choosing a cover, consider these factors:
- Material: Look for heavy-duty, durable materials such as vinyl, polyester, or canvas. These materials offer excellent protection from moisture, UV rays, and dirt. Avoid cheap, thin materials, as they may not provide adequate protection.
- Fit: Choose a cover designed specifically for your grill model or one that can be adjusted for a snug fit. A tight fit is important, as it prevents wind from blowing the cover off and keeps out dirt, dust, and insects.
- Vents and lining: Opt for a cover with built-in vents to allow for air circulation and prevent mold and mildew growth. A soft lining can also help protect your grill’s finish from scratches.
- Ease of use: Look for covers with simple installation and removal features, such as adjustable straps, elastic hems, or zipper closures.
By following these essential BBQ maintenance tips, we can keep our grills in top shape and enjoy delicious barbecues for many seasons to come. Happy grilling, folks!
Repairing Common BBQ Grill Problems
We all know the feeling of excitement when we’re gearing up for a barbecue, only to find that our trusty grill has some issues. Fear not, grill masters, as we’re here to help identify and fix common BBQ grill problems so your grill can be in top shape, ready to roll for the next cookout.
Addressing Ignition System Issues
The ignition system is what allows us to fire up our grill. When it doesn’t work, it can be frustrating, to say the least. Here are some common ignition system problems and how to fix them:
Push-button igniter malfunction: First, make sure the battery is still good. If it is, then try removing the button and cleaning the contact points with a wire brush. If that doesn’t work, it might be time for a new ignition module.
Spark generator failure: If the spark generator isn’t producing any sparks, try replacing the battery and checking the wiring connections. If that doesn’t resolve the issue, consider purchasing a new spark generator.
Faulty electrodes: Make sure the electrodes aren’t coated in grease or debris and are properly aligned. If they are corroded or damaged, it’s time to replace them.
Fixing Uneven Heating and Hot Spots
We’ve all been there – one side of our food is cooked to perfection while the other is barely heated. Uneven heating can be a real bummer, so let’s look at some ways to combat this issue:
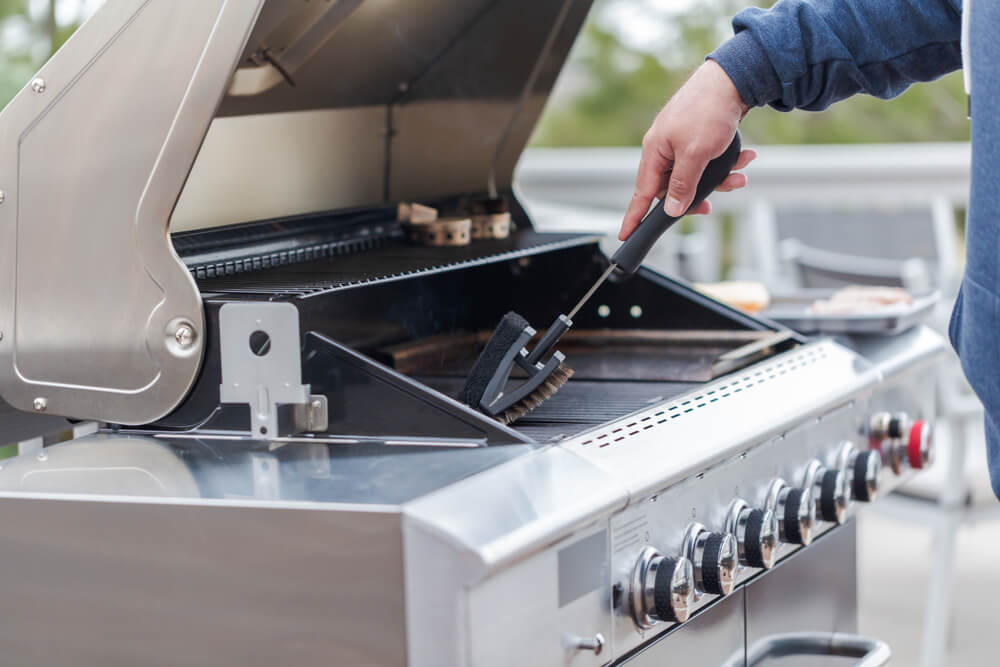
Make sure the burners are clean: Grease buildup on the burners will hinder their performance, creating hot spots. Simply scrub the burners with a wire brush to remove any debris.
Check the pressure regulator: If the burners are still not heating evenly, inspect the gas pressure regulator. A damaged regulator could lead to uneven gas flow and heating problems.
Examine the gas lines: Gas lines can become pinched, obstructed, or damaged over time, resulting in uneven heat distribution. Check for any issues and replace the line if needed.
Dealing with Rust: Treatment and Prevention
There’s one thing that can ruin a grill’s aesthetic – rust. It not only makes the grill look shabby, but can also seriously affect its performance. To treat existing rust and prevent it from returning, follow these steps:
Treat existing rust: Use a wire brush to remove all rust spots from the grill grates and body. Then, apply a rust-dissolver solution following the manufacturer’s instructions. Finish by rinsing it off and letting it dry thoroughly.
Protect your grill grates: Coat your grates with cooking oil or a high heat grill spray to prevent rust buildup. This will also help make cleaning after a cookout a breeze.
Invest in a grill cover: Protect your grill from the elements by investing in a durable grill cover. This will prevent moisture from causing rust, as well as protect it from dirt and debris.
By addressing these common BBQ grill problems, we can ensure our grills are in top shape for the grilling season ahead. Just remember to perform regular maintenance and keep an eye out for any issues – soon, we’ll be enjoying our perfectly cooked BBQ in no time.
The Ultimate BBQ Maintenance Schedule
When it comes to enjoying delicious barbecue, keeping your grill in tip-top shape is key. Proper maintenance ensures that your grill remains efficient, clean, and safe to use. To help you stay on top of your BBQ game, we’ve put together the ultimate maintenance schedule, broken down into daily, monthly, and yearly tasks. Let’s get started!
Daily Maintenance Tasks for Your Grill
Every time you use your grill, there are a few simple tasks you should complete to keep it clean and functioning well:
Preheat the grill: Before cooking, crank up the heat on high for 10-15 minutes. This helps burn off any leftover residue and sanitizes the grates.
Clean the grates: After preheating, use a long-handled grill brush to scrub the grates clean. Doing this while the grates are still hot makes it easier to remove stuck-on food.
Oil the grates: After cleaning, use a pair of tongs and a wad of paper towel dipped in vegetable oil to coat the grates lightly. This prevents food from sticking and promotes beautiful grill marks.
Check for gas leaks: If you have a gas grill, spray the hoses, connections, and valves with soapy water while the grill is on. If you see bubbles forming, this indicates a gas leak that needs fixing.
Post-cooking clean-up: Once you’re done cooking and the grill has cooled slightly, use your grill brush again to give the grates a thorough cleaning. This prevents a build-up of grease and debris.
Monthly BBQ Maintenance Routine
In addition to the daily tasks, there are a few chores you should complete every month (or after 10-12 uses) to keep your grill in peak condition:
Deep clean the grates: Remove the grates and soak them in a solution of warm water and dish soap. Use a nylon scrub brush to remove any stubborn grime, then rinse and dry thoroughly.
Clean the burner tubes: For gas grills, remove any obstructions in the burner tubes. Use a brush or pipe cleaner to remove debris and insects that could affect the gas flow.
Scrape the grease tray: Accumulated grease in the tray can lead to flare-ups and unpleasant odors. Remove the tray, scrape off any solidified grease, and give it a good clean with soapy water.
Check ignition system: Test the ignition system on your grill, making sure the spark igniter is clean and functioning properly. Replace any worn or corroded parts as necessary.
Yearly Grill Check-Up and Servicing
At least once a year (ideally at the start of the grilling season), take some time to give your grill a thorough check-up:
Inspect hoses and regulators: For gas grills, check hoses and regulators for any signs of wear, tear, or corrosion. Replace any damaged parts to prevent gas leaks and ensure a consistent flow.
Tighten connections: Check all screws, bolts, and connections on your grill, making sure they’re secure and tightened. Loose parts can lead to uneven heat distribution and decreased performance.
Repaint or touch up: If your grill’s exterior paint is chipped or scratched, consider repainting or touching up those areas to prevent rusting and extend the life of your grill.
Replace grates or burners: Over time, grates and burners can wear out or corrode. Replace them as necessary to maintain optimal grilling performance.
By following this ultimate BBQ maintenance schedule, you’ll keep your grill in top shape and ensure many seasons of delicious, mouth-watering barbecue. Happy grilling!
Grill Safety Tips
Grilling season is upon us, and we couldn’t be more excited to fire up our BBQs! But before we throw on those burgers and steaks, it’s important to refresh our memories on some essential grill maintenance tips to keep everything running smoothly and safely. In this section, we’ll cover proper lighting techniques for charcoal and gas grills, safe cooking temperatures and practices, and fire safety to prevent and deal with grill fires.
Proper Lighting Techniques for Charcoal and Gas Grills
When it comes to lighting up your grill, safety should always come first. For charcoal grills, follow these steps:
- Open the vents on your grill to allow oxygen in.
- Place crumpled newspaper in the bottom of the grill, and pile charcoal on top.
- Apply lighter fluid evenly to the charcoal.
- Let the fluid soak in for about 30 seconds, and then light it with a long match or lighter to keep your hands safe from the flames.
- Let the charcoal burn for 10-15 minutes, or until it’s covered in white-gray ash, to ensure it’s ready for cooking.
When it comes to gas grills, make sure you’re doing the following:
- Double-check that your propane tank is full and connected to your grill properly.
- Open the grill lid to avoid any gas build-up before lighting it up.
- Turn on the gas supply and give it a moment to reach the burners.
- Push the ignition button or light the grill with a long match or lighter, following the manufacturer’s instructions.
- Preheat the grill for about 10-15 minutes before putting food on it.
Safe Cooking Temperatures and Practices
We all love a delicious, juicy burger or a perfectly cooked steak – but there’s nothing worse than getting sick from undercooked food. To make sure your BBQ favorites are cooked to perfection while being safe to eat, familiarize yourself with proper internal cooking temperatures. You can find a helpful chart here, but generally speaking, these are some temperatures to aim for:
- Beef, pork, veal, and lamb: 145°F (63°C), with a 3-minute rest time after coming off the grill.
- Ground meats (burgers, sausages, etc.): 160°F (71°C).
- Poultry (chicken, turkey, duck): 165°F (74°C).
Additionally, don’t forget these best practices as you grill:
- Keep raw and cooked foods separate to avoid cross-contamination.
- Use a meat thermometer to accurately measure internal temperatures.
- Let the meat rest for a few minutes after grilling to allow the juices to redistribute and the temperature to even out.
Fire Safety: Preventing and Dealing with Grill Fires
Grill fires can happen in a snap, so it’s crucial to be prepared and know how to handle them before they get out of control. To prevent fires, make sure you’re practicing routine maintenance, such as cleaning grease buildup and checking for propane leaks. Following proper lighting techniques and keeping your grill at least 10 feet away from your house are also excellent preventative measures.
In case a fire does break out, it’s essential to know how to handle it. First, close the grill lid and shut off the gas supply if it’s a gas grill. For smaller fires, you can use a grill mitt to smother the flames or carefully pour baking soda on the fire. For larger fires, always keep a fire extinguisher nearby – and use it if needed. While it may sound obvious, never use water to put out a grease fire! Above all else, prioritize your safety and the safety of those around you – if the fire gets out of hand, call 911 immediately.
By following these grill safety tips and keeping your barbecue in top shape, you’re guaranteed to have a fantastic grilling season! So go ahead, invite your friends and family over, and enjoy those mouthwatering BBQ feasts!
Upgrading Your BBQ Grill
Sometimes, no matter how well we take care of our beloved barbecue grills, it’s time to say goodbye and bring in a new one. In this section, we’ll discuss when it’s time to upgrade, how to choose the right grill for your needs, and new features and technology to look out for!
When to Upgrade: Signs Your Grill Needs Replacement
Although we’d love our barbecue grills to last forever, the reality is that they won’t. Here are some signs that it might be time to upgrade:
Rust: Unavoidably, grills get exposed to the elements, and rust can build up over time. If you’re scrubbing away rust year after year and finding it difficult to keep up, it might be time to consider a replacement.
Uneven Heat Distribution: If you’re experiencing hot and cold spots on your grill, it can be challenging to cook food evenly. This could be a sign that the burners or other essential parts need replacing – or that it’s time for a new grill altogether.
Frequent Repairs: If you’re constantly fixing your grill or replacing parts, the cost and hassle can add up. Assess whether you’d be better off investing that time and money into a new grill.
It’s Just Not Big Enough: As our cooking skills and enthusiasm grow, we might find ourselves needing a larger grilling area. If you’re constantly running out of space, it could be time to look for a bigger grill.
Functionality: If your grill is lacking essential features or simply outdated, it might be time for an upgrade. New grills often come with more precise temperature controls, better insulation, and advanced technology to make your grilling experience more enjoyable and efficient.
Choosing the Right BBQ Grill for Your Needs: Buying Guide
Before you start shopping for a new BBQ grill, consider these factors to make the right choice for your needs:
Fuel Type: Decide what type of fuel you’d like to use. Gas grills provide easy temperature control and are simple to clean, but they typically cost more upfront and don’t provide that smoky flavor that some people love. If you prefer the traditional taste of charcoal, then a charcoal grill might be the better option.
Grill Size: Consider the size of the cooking surface you need for your barbecuing requirements. Are you regularly hosting big cookouts, or do you only need a grill for occasional small gatherings? Make sure there’s enough space for your cooking style without going overboard.
Portability: If you plan on taking your grill on camping trips or tailgating events, portability is crucial. Look for a grill with lightweight materials, wheels, and a foldable design to make transportation easy.
Budget: Determine a budget before shopping, to help you stay focused and avoid getting lured into buying a grill with unnecessary features that don’t suit your needs.
Extras: Think about the additional features you’d like, such as side burners, storage cabinets, or rotisserie kits. Be realistic about the features you’ll use and avoid getting lured into buying a grill with extras that you’ll never touch.
New Grill Features and Technology: What to Look for
When upgrading your grill, don’t miss out on the latest features and technology that can take your BBQ game to the next level:
WiFi and Bluetooth: Some of the latest grills come with WiFi and Bluetooth connectivity, allowing you to control and monitor your grill from your smartphone. This feature can come in exceptionally handy if you’re looking to multitask during your barbecue.
Infrared Heating: Infrared burners provide direct heat to the food, helping to lock in juices and providing an even cooking surface. It can significantly reduce flare-ups, eliminate cold spots, and cut down on your cooking time.
Advanced Ignition Systems: Safer and more efficient ignition systems have become more popular in recent years. Some grills feature a push-button electronic ignition system, which ensures an easy-start every time.
Temperature Probes: Accurate temperature monitoring is crucial for perfectly barbecued food. Some grills now come with built-in thermometer probes, making it simple to ensure your meat reaches the desired internal temperature.
By taking the time to assess when it’s time for an upgrade and carefully researching the right grill size, type, and features, not only will you be investing in an appliance that meets your needs, but you’ll also be well-equipped to maintain it and keep it in top-notch condition for years to come. Happy grilling!
Frequently Asked Questions
How Often Should I Clean My Grill?
It’s always a good idea to give your BBQ grill a quick cleaning after every use. You don’t have to do a deep clean each time, but a quick brush down of the grates will go a long way in preserving your grill’s longevity and making sure your next cookout is top-notch. That said, we recommend doing a thorough cleaning at least twice a year (more often if you’re an avid griller) to keep your BBQ in tip-top shape.
What is the Best Cleaner for BBQ Grills?
There’s no need to break the bank on a fancy cleaner. In fact, some of the best grill-cleaning tools are probably already in your kitchen! A simple mixture of equal parts water and white vinegar works wonders for degreasing and cleaning most grill surfaces. Just spray it on, let it sit for a few minutes, and scrub away with a nylon brush or scouring pad. For stuck-on gunk, try adding a little baking soda to the mix. And as always, don’t forget to check your grill’s manual for any specific cleaning recommendations from the manufacturer.
Can I Use My BBQ Grill Indoors?
Well, technically you could, but we strongly advise against it. Grilling indoors comes with a slew of potential hazards, like carbon monoxide buildup and fire risks. If you’re itching for that delicious grilled flavor without stepping outside, we recommend investing in an indoor grill or grill pan instead. It’s just not worth risking your safety (and your home) for a tasty burger.
Why Is There Rust on My Grill Grates?
Rust forms on grill grates when they’re exposed to moisture – often a result of leaving the grates wet after cooking or cleaning. To prevent rust, make sure to dry your grates thoroughly after washing and consider giving them a light coat of cooking oil to create a barrier against moisture. If you already have rust on your grill grates, fear not! Just grab some steel wool or a brass-bristle brush and scrub away until the rust is gone. You may also want to consider investing in stainless steel or porcelain-coated grates, as they are more resistant to rust than cast iron or plain steel.
How Long Does a BBQ Grill Last?
The lifespan of your BBQ grill depends on a number of factors, like the quality of its construction, how often you use it, and how well you maintain it. On average, a well-built and properly cared for grill can last for 5 to 15 years. To extend the life of your grill, make sure to keep it clean, store it in a dry, protected area when not in use, and follow the manufacturer’s maintenance recommendations. And don’t forget – the more love you give your grill, the more delicious backyard barbecues you’ll get to enjoy!
Amazon and the Amazon logo are trademarks of Amazon.com, Inc, or its affiliates.
